
Free Granny Square Patterns
Granny squares are one of the most versatile building blocks in crochet: small, worked-in-the-round motifs that can become almost anything once you start joining them. A handful becomes a coaster set. A few dozen become a blanket. Joined into panels and shaped, they become a bag, a cardigan, or a table runner. Each square is quick to finish, portable, and a forgiving way to use up yarn from other projects.
Because every square is small, granny square patterns are a favourite for scrap yarn, colour experimentation, and projects you can pick up and put down without losing your place. Choose a square style below to see its materials, size and skill level, then download the free PDF.
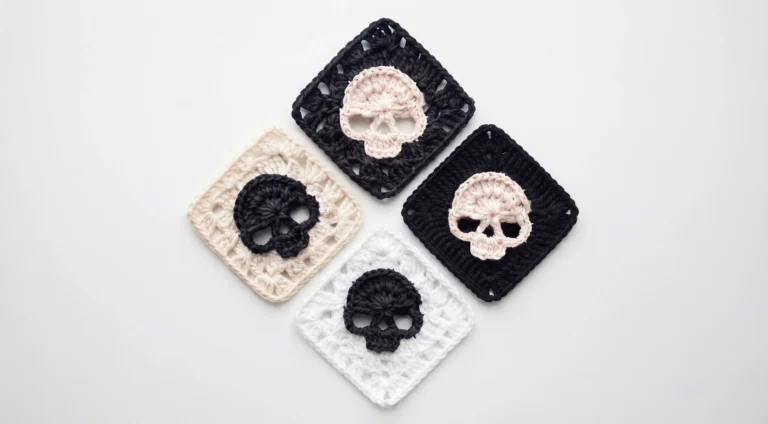
Popular Kinds of Granny Square
Small projects, endless possibilities; find something fun to crochet for every season and skill level.
1
Classic Granny Square
Works from the centre outward in rounds, with clusters of double crochet separated by chain spaces, and a distinct corner at each side. The easiest to learn first.
2
Solid Granny Square
Fills in every stitch with no gaps, giving a denser, more fabric-like finish. Takes a little longer but makes a sturdier square.
3
Sunburst Granny Square
Starts with a tight, textured centre round before opening into standard granny rounds, for a more dimensional, flower-like look.
4
Granny Stripe / Join-As-You-Go
Worked and connected to its neighbours in the same session, saving significant finishing time.
5
Granny Square Blankets and Throws
The classic use, dozens of squares joined into a full-size afghan or a smaller lap blanket.
6
Granny Square Bags and Totes
Solid or stiffened squares joined into panels, often with a lining, to build a sturdy everyday bag.
7
Granny Square Garments
Squares joined into rectangles before shaping, a traditional base for a boxy cardigan, vest or poncho.
8
Granny Square Home Décor
Smaller numbers of squares, joined or used singly, for coasters, table runners and placemats.
Why Granny Squares Are Great for Beginners
Granny squares are one of the best entry points into crochet. If you’re learning how to crochet a granny square for the first time, you’re starting in one of the best possible places: the classic version uses just two stitches, chain and double crochet, repeated in a simple, predictable pattern. Once you’ve learned one round, every following round uses the same logic, just with more stitches.
The two skills that take the most practice are working an even, consistent corner at all four points, and joining finished squares neatly, both covered in detail below.
Stitches Granny Squares Rely On
The right stitch changes how warm, stretchy or delicate the finished piece feels.
Choosing Yarn for Granny Squares
01
Worsted weight yarn is the standard choice, and it’s a genuinely forgiving category for substitution, since the finished square’s size, not a fixed pattern, usually determines how many you’ll need. Acrylic is the most common choice for blankets, since it’s affordable, washable and comes in a huge range of colours. Cotton gives more structure for bags and coasters. Wool blends add warmth for garments.
02
Because granny squares are so often mixed across colours, buying yarn in smaller quantities across many shades, rather than large amounts of just two or three colours, tends to give the most classic scrappy look.
03
If you’re planning a bag or a piece that needs real structure, work a test square in your chosen yarn one hook size smaller than usual, and compare it to the same square at your normal hook size. The tighter version will feel noticeably sturdier, which matters far more for a bag than it does for a blanket meant to drape softly.
Choosing the Right Granny Square Size
Square size depends entirely on your yarn weight, hook size and how many rounds you work, which is part of the appeal, since the same basic pattern scales up or down easily.
01
Coasters and Small Motifs
About 3 to 4in (7.5 to 10cm)
02
Standard Blanket Squares
About 4 to 6in (10 to 15cm)
03
Large Squares
About 8 to 10in (20 to 25cm)
You’ll need fewer of them per blanket.
04
Giant Squares
12in (30cm) or more
A whole blanket can come from just a handful of them.
Because granny squares are usually joined into a larger piece, keeping every square the same size matters more than hitting an exact measurement, so check your first square before you make the rest.
Why Do Granny Squares Curl and How Do You Fix It?
Almost every crocheter runs into a granny square that curls, cups, or ruffles instead of lying flat, and it’s one of the most commonly asked questions in the craft. A few things cause it, and they’re all fixable.
Tight tension is the most common cause. If your stitches are pulled snug, the outer rounds physically can’t spread out as far as they need to for the square to lie flat, so the fabric bows instead. Try a hook one size larger than you’d normally use for the yarn, and aim for stitches that sit comfortably on the hook rather than gripping it tightly.
Not turning your work can also contribute on larger squares. Many patterns call for turning after every round, which alternates the direction your stitches lean and helps keep tension even on both sides. If a pattern doesn’t mention turning and your squares consistently curl, try turning anyway and compare the result.
Stitch count drift is a quieter cause. If a round doesn’t increase by quite enough stitches to keep pace with the growing circumference, the square pulls inward slightly at the edges. Following the stitch counts given at the end of each round, rather than estimating by eye, catches this early.
Blocking fixes almost any remaining curl. Pin the finished square flat, right side up, on a blocking mat or a towel over a flat surface, dampen it lightly, and let it dry fully before unpinning. For a multi-square project, block every square individually before joining, since a flat, even square is far easier to line up neatly than one that’s still curled.
The Best Ways to Join Granny Squares
Joining is where a granny square project either comes together neatly or starts to look uneven, and there are several methods worth knowing.
Whip stitch is the fastest and most beginner-friendly join, worked with a tapestry needle through the outer loops of two edges held together. It’s quick, but the seam shows slightly on both sides.
Single crochet join uses a hook rather than a needle, working single crochet through both squares’ edges at once. It’s sturdier and adds a subtle decorative ridge, which some crocheters lean into with a contrasting colour.
Slip stitch join is worked the same way as single crochet but produces a flatter, less bulky seam.
Invisible / mattress stitch join, worked with a needle through just the front loops or back bumps of each square, gives the flattest, most seamless result, but takes the longest.
Join-as-you-go connects each square to its neighbours during the final round of crochet, saving hours of finishing time on a large blanket, though it requires more planning up front.
Whichever method you choose, keep your join tension loose rather than tight. A join pulled tighter than the squares themselves is one of the most common reasons a finished blanket buckles or won’t lie flat, even when every square was blocked correctly.
Why Granny Square Projects Stall and How to Finish One
If you’ve ever made a handful of squares, set the project aside, and never quite come back to it, you’re not alone. It’s common enough in the crochet community to be something of a running joke: a granny square blanket is often the project people start with the most enthusiasm and finish the least often, simply because the total number of squares needed for a full-size throw, often 60 or more, is genuinely a lot of repeated work, and the middle stretch of a project can lose momentum once the novelty of learning the pattern wears off.
A few things help. Treat squares as a portable, in-between project rather than your main focus. Keep a small bag of yarn and a hook with you, and work a square or two while watching something, commuting, or waiting somewhere, rather than trying to sit down and finish the whole blanket in one dedicated push. Squares are ideal for this precisely because each one is a self-contained unit you can finish in a single sitting.
Set a square count goal rather than a deadline. “One square a day” or “a square every time I finish a coffee” is a far gentler pace than “finish the blanket by winter,” and it still adds up: 60 squares at one a day is done in two months, almost without noticing the effort.
Join as you go if starting a huge stack of loose squares feels daunting. Seeing the piece grow as a connected whole, rather than as a pile of separate squares waiting to be dealt with, keeps the finish line visible the whole way through.
Try a mood or memory blanket format, where each square represents a day, a colour choice, or a small decision, which turns the repetition into something with meaning attached rather than just a stitch count to get through, and gives you a reason to keep adding one more square even on days you don’t feel like crocheting much at all.
It’s also worth accepting that an unfinished granny square project isn’t wasted, even if it never becomes the blanket you first imagined. A stack of a dozen squares can become a set of coasters, a small bag panel, or a cushion cover instead, all of which need far fewer squares than a full throw.
What You Can Make From Granny Squares
Granny squares scale from a five-minute project to a heirloom blanket, which is part of why the category is so open-ended.
1
Blankets and throws: the classic use, and the most common reason people start making squares in the first place.
2
Bags and totes: solid squares, often stiffened or lined, joined into panels for a sturdy everyday bag.
3
Garments: squares joined into rectangles before shaping form a traditional base for a boxy cardigan, vest or poncho, without any complex garment shaping.
4
Table runners and placemats: a row of squares joined end to end makes a quick runner, and a single square doubles as a coaster or trivet on its own.
5
Cushion covers: two matching panels of joined squares, seamed on three sides with an opening for the insert, make a quick decorative cushion.
6
Scarves and wraps: a single long strip of joined squares becomes a simple, textured scarf with almost no additional shaping needed.
A Brief Note on Where Granny Squares Come From
The granny square’s name reflects its long history as a classic, often intergenerational project, traditionally made from scrap yarn and passed down between family members rather than following any single designer’s pattern. That scrappy, make-do origin is part of why the style still works so well today for using up leftover yarn, and why there’s no single “correct” colour palette for a granny square project the way there might be for a more modern, precisely charted design
Common Mistakes Beyond Curling
Granny Square Habits Worth Building
A handful of habits make these quick projects even more enjoyable.
Granny Square Questions, Answered
What to Crochet Next
Made a stack of squares and ready to put them together? Browse our blankets for a full pattern to build toward, or check out our bags for a smaller granny-square project.