
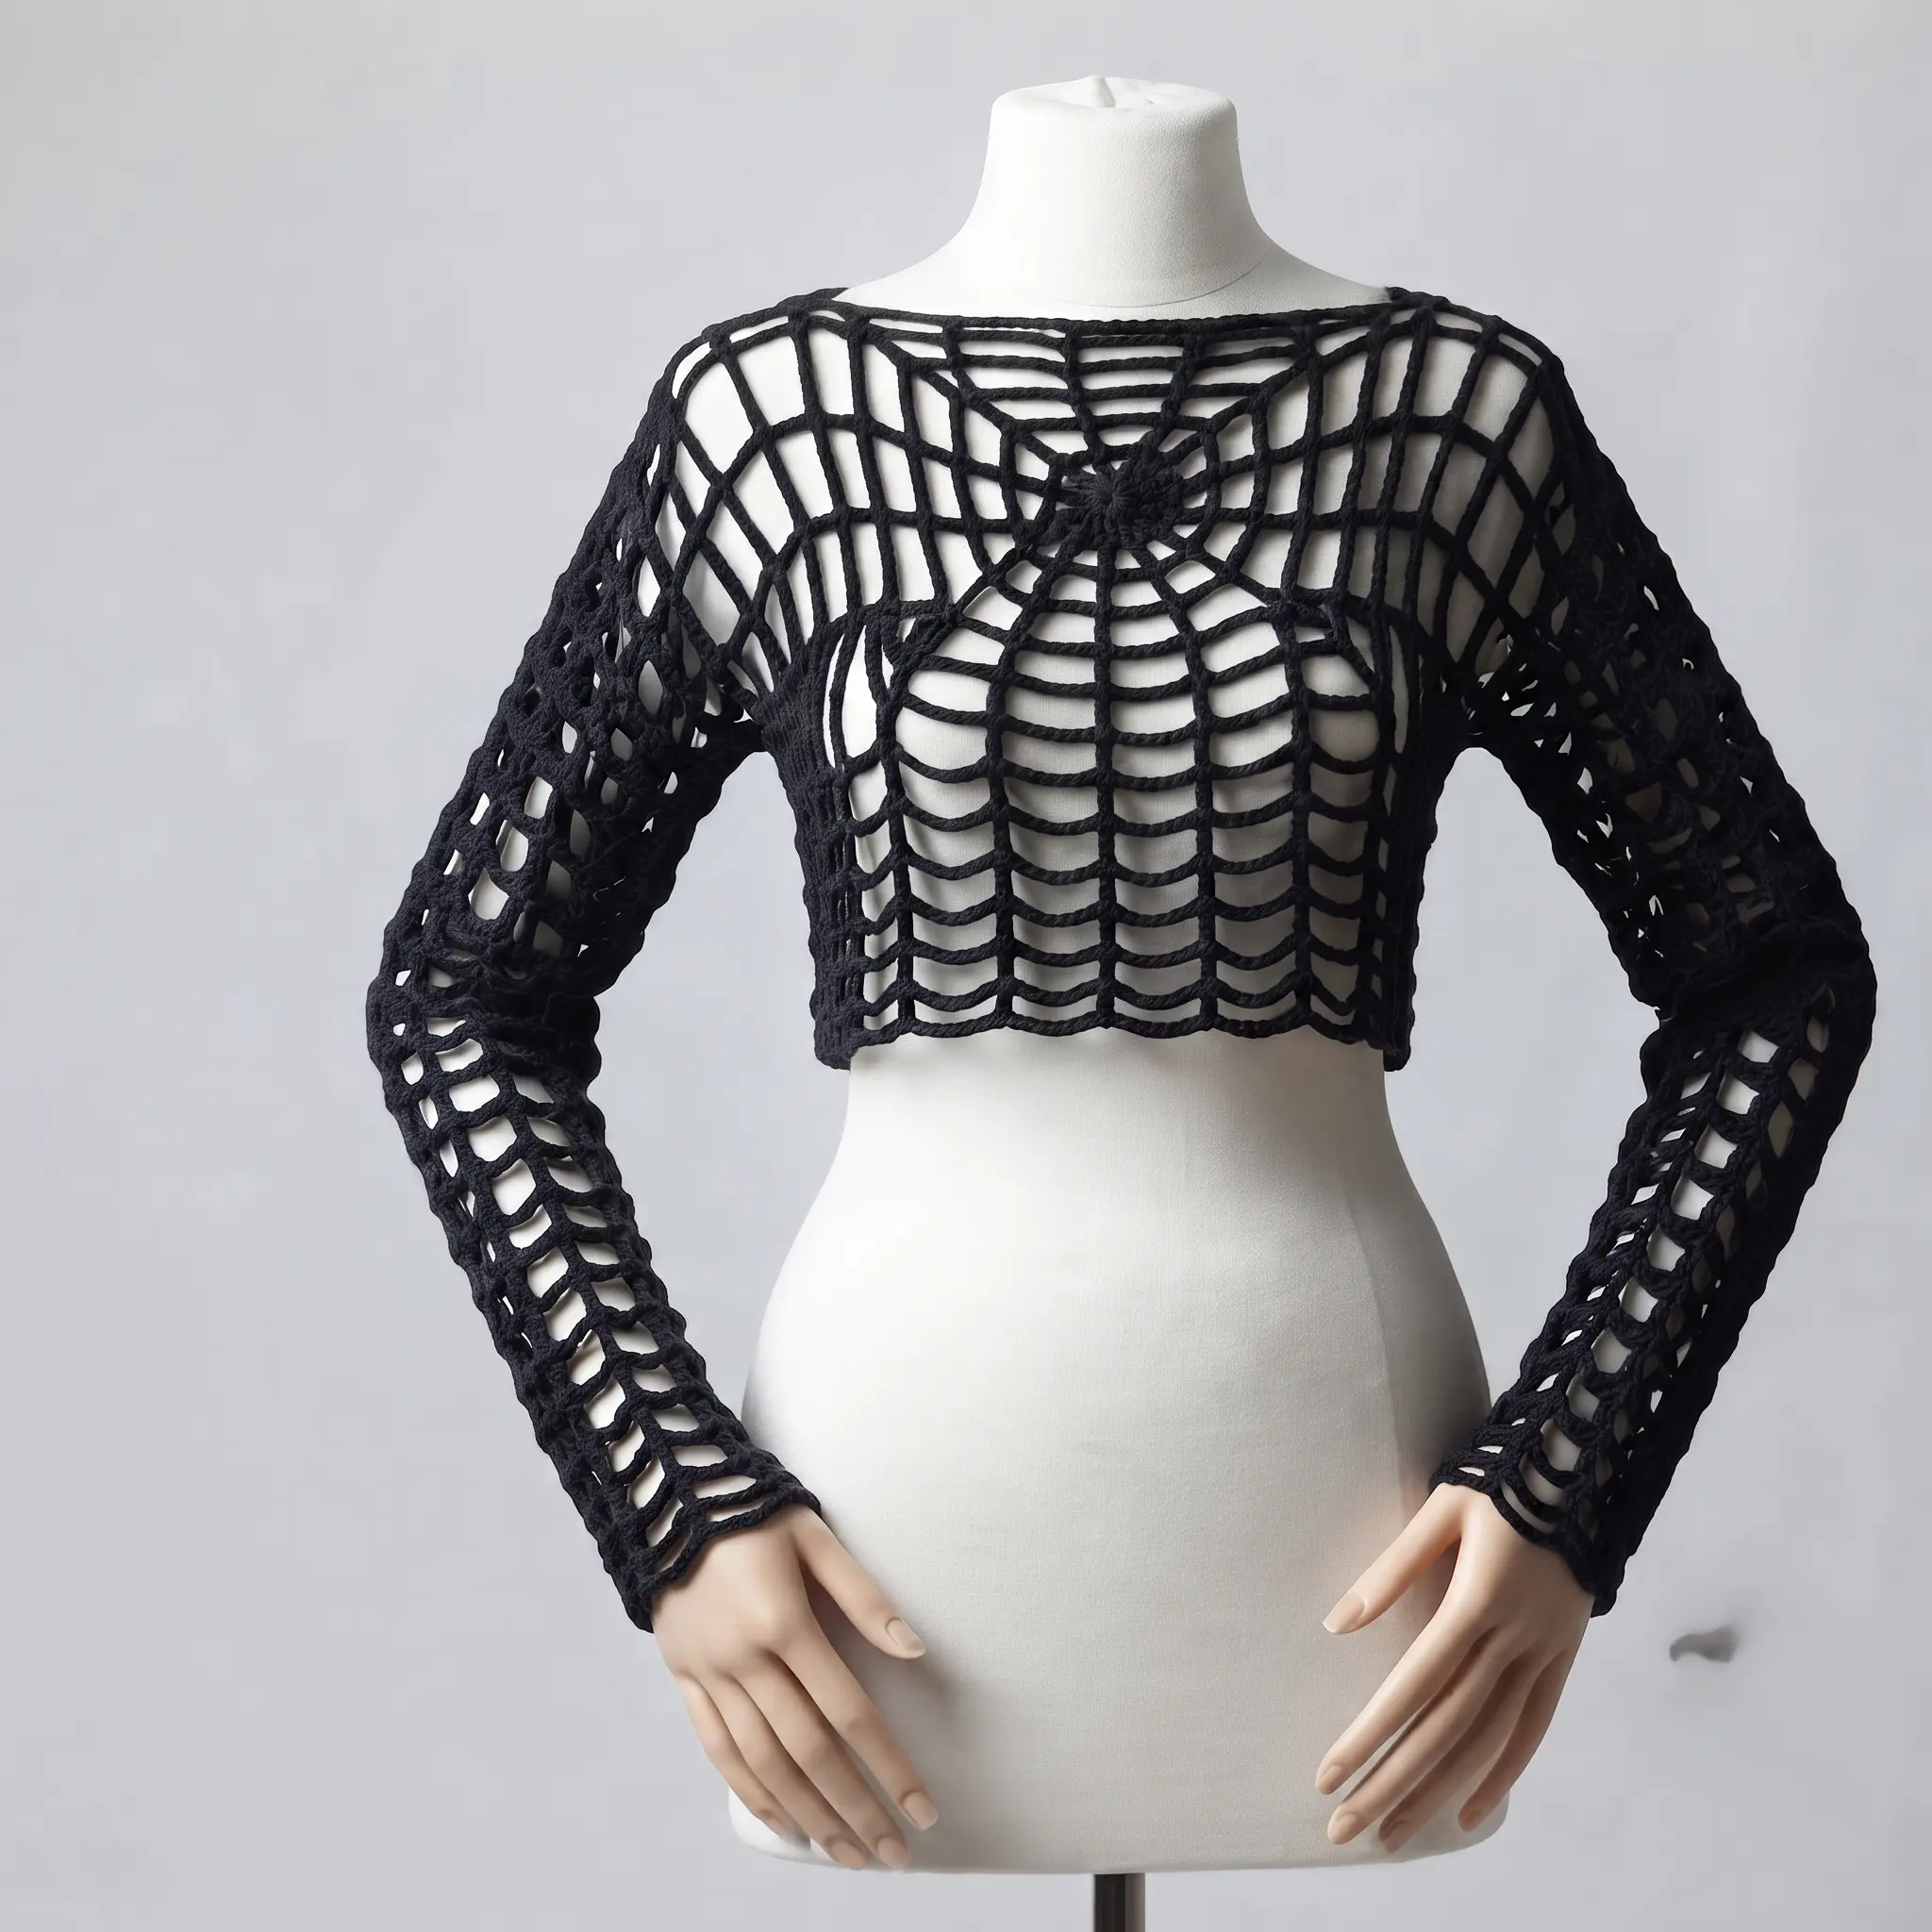
Crochet Spider Web Top Pattern Free Made to Measure Crop Top
Spooky, stylish and made to fit you perfectly. Our free crochet spider web top pattern creates a lacy crop top with a dramatic web motif radiating across the front and back, finished with airy sleeves worked right onto the body. It’s made to your own measurements, so it fits beautifully whatever your size, and it’s the statement piece your Halloween wardrobe has been waiting for.
Why You’ll Love This Crochet Spider Web Top
Most Halloween crochet is for the home: pumpkins, bats and garlands. This one is for you to wear. A spider web spreads out from the center of each panel in widening rings of chain spaces, creating an eye catching, open lace look that’s both gothic and genuinely pretty.
The beauty of this design is that it isn’t tied to a size chart. You measure yourself, crochet each panel until it matches, and the top fits you exactly. No guessing between sizes, no worrying about whether it will be too tight or too baggy.
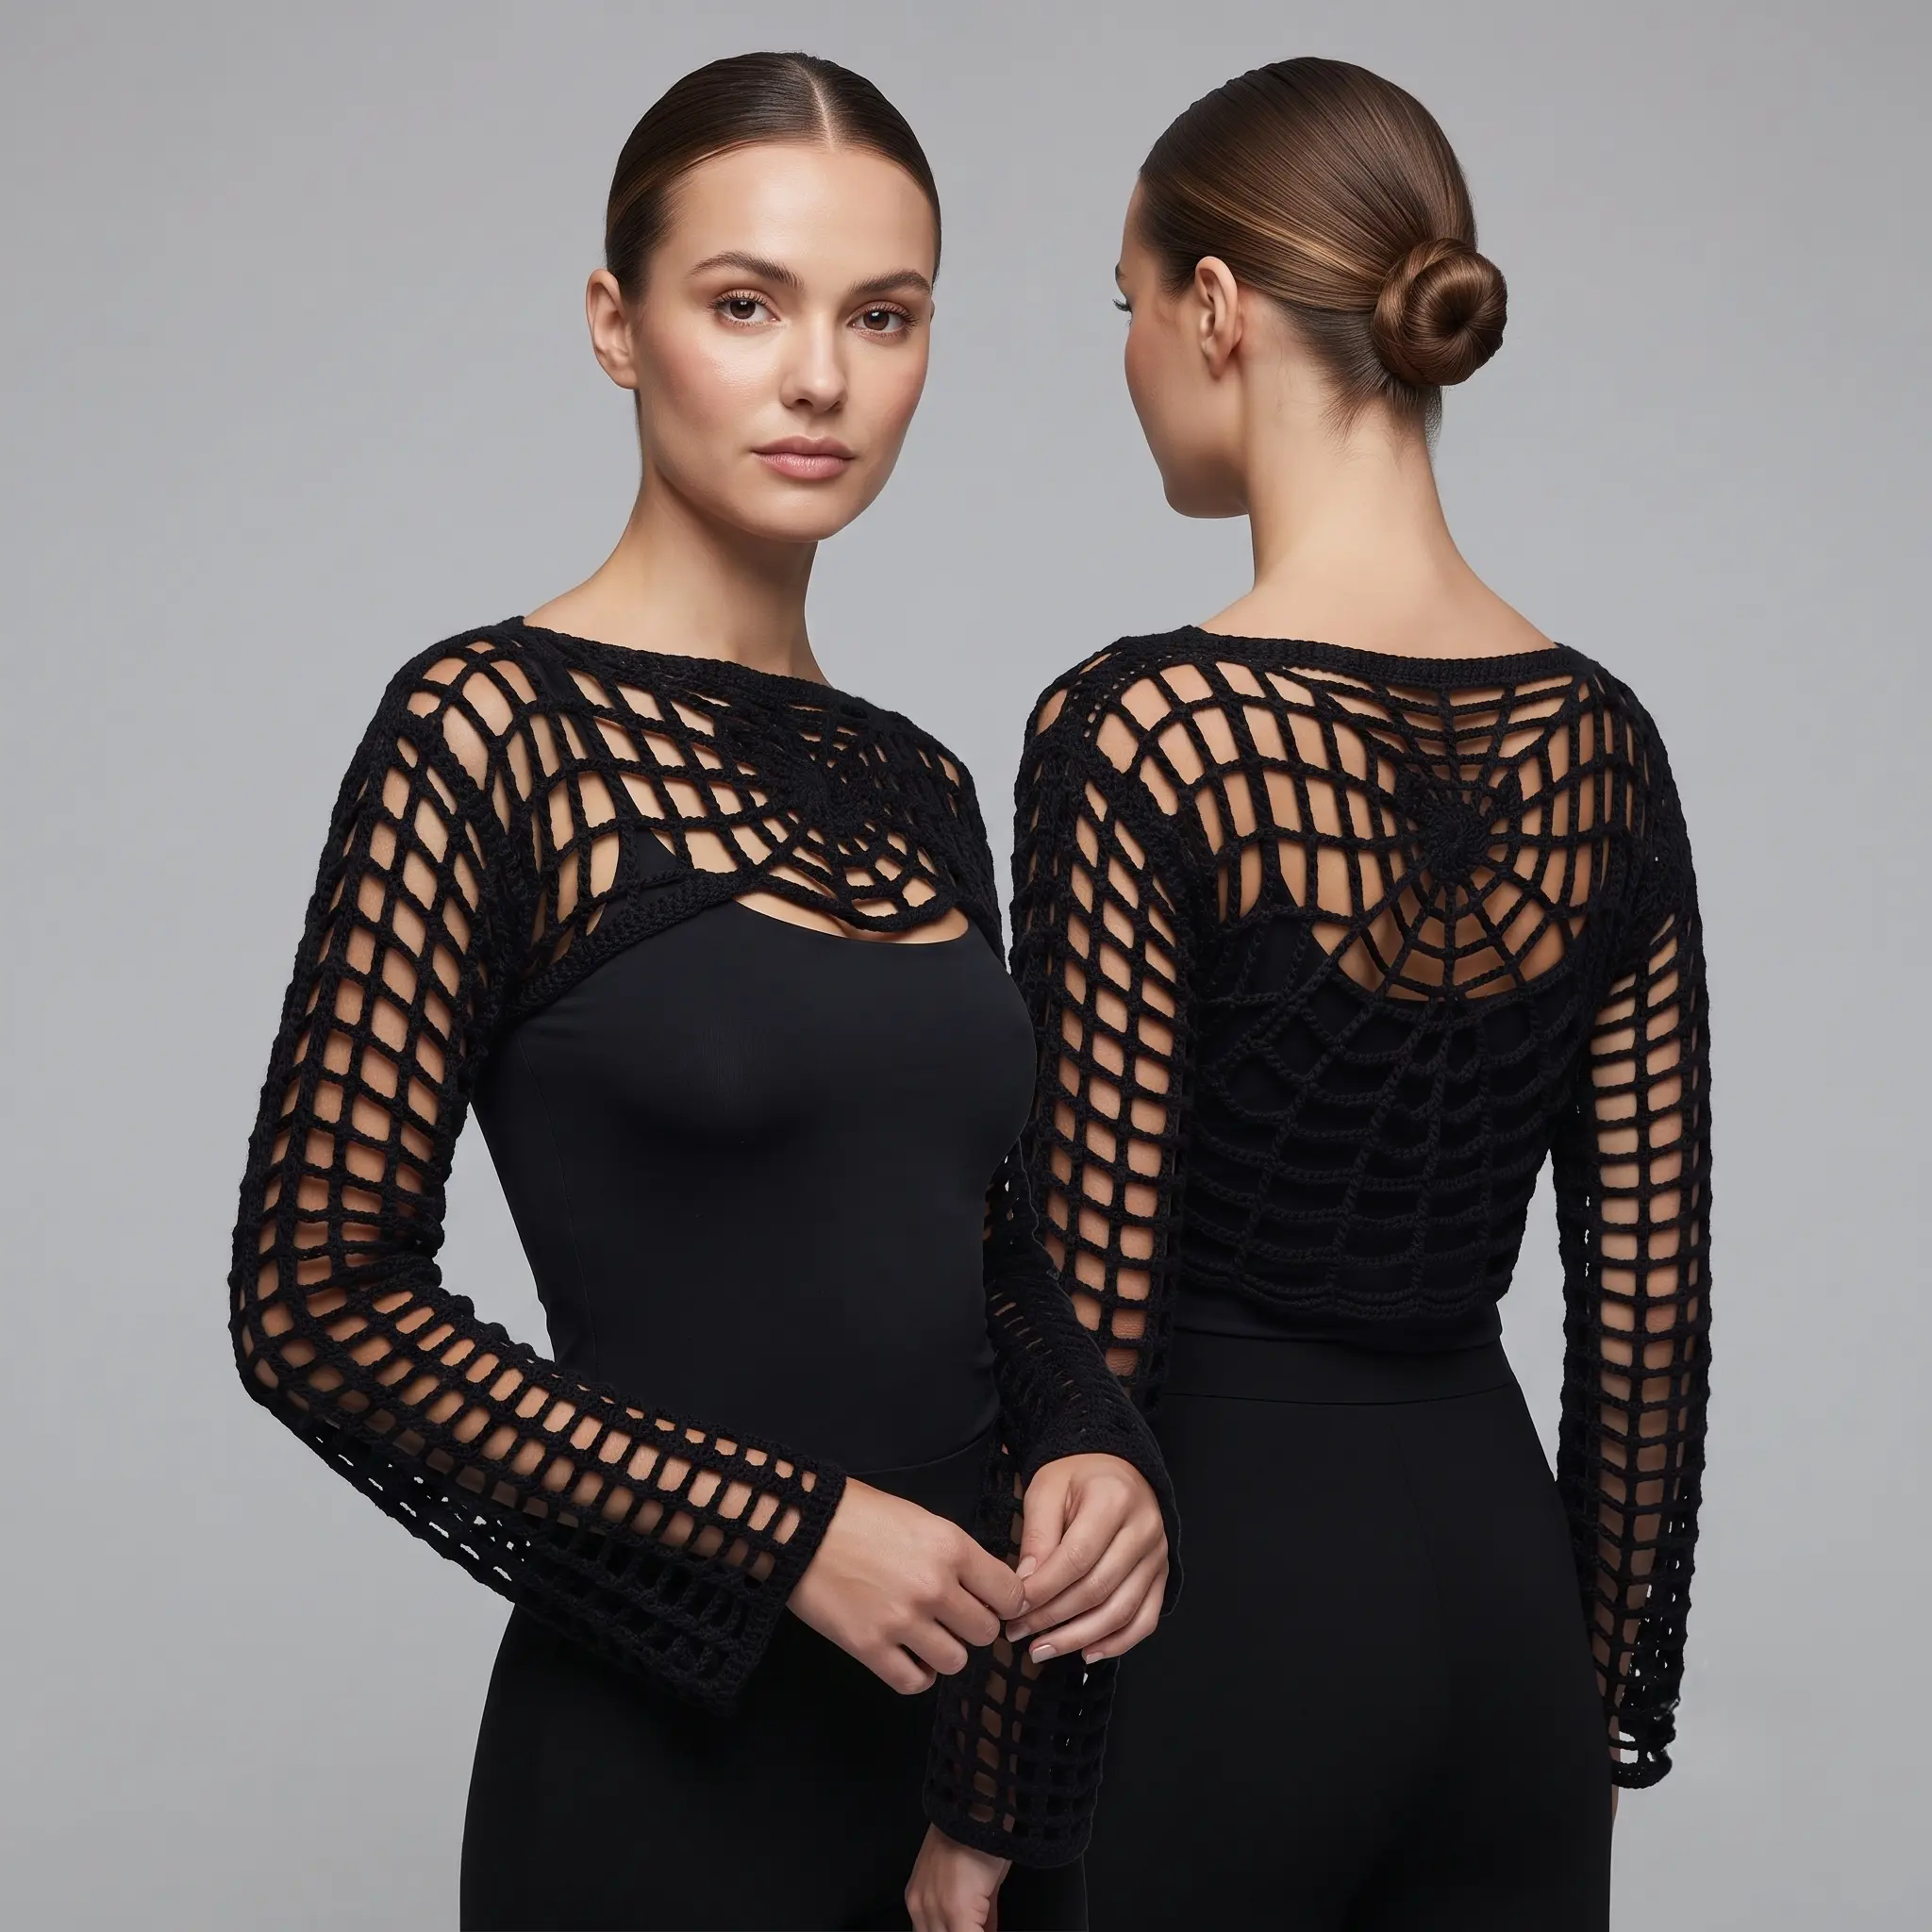
It’s also surprisingly versatile. Layer it over a black cami or bralette for a Halloween party, wear it with high waisted jeans for a concert, or style it over a slip dress for a festival look. It’s the kind of handmade piece that turns heads every time.
What’s Inside the Free Spider Web Top Pattern
Your PDF download walks you through the whole garment:
- A simple measurement guide to find your two key measurements
- Round by round instructions for the spider web panels
- Clear guidance on switching from a square to a rectangle as your panel grows
- Three easy charts so you always know how to start and end each row
- Fitting and seaming advice, including optional side panels for larger sizes
- Sleeve instructions worked in the round, with no sleeve seams
- US crochet terms throughout
Materials for Your Spider Web Top
| Material | Details |
|---|---|
| Yarn | DK (weight 3) or thicker |
| Crochet hook | As recommended on your yarn label; 4 to 5.5mm suits most DK and heavier yarns |
| Measuring | Measuring tape |
| Notions | Stitch markers, scissors, tapestry needle |
| Skill level | Advanced Beginner |
| Sizing | Made to measure, any size |
| Crochet terms | US |
Black is the classic choice for a spider web, and it looks especially striking layered over a contrasting color. For something softer, try deep purple, charcoal or even a cream web over black. A yarn with a little drape, such as a cotton blend, helps the lace hang beautifully on the body.
Made to Measure for a Perfect Fit
This top uses just two simple measurements. Measurement A is the width across the front of your bust. Measurement B is a little wider than your shoulders, wide enough for the front and back panels to meet at the side seams.
Each panel starts as a square and grows until it reaches Measurement A. Then you continue on three sides only, so the panel becomes a rectangle, until it reaches Measurement B. Holding the panel up to your body as you go is the easiest way to check the fit.
Want it longer? Keep working all four sides until you reach Measurement B for a longer, boxier top. For sizes 2XL to 5XL, if the panels aren’t quite wide enough, the pattern shows you how to add side panels for a comfortable fit.
How the Spider Web Grows
The web begins at the very center with a small ring. From there, each round adds spokes of tall stitches, double, triple and double triple crochet, connected by chain spaces that get longer as you move outward. Those long chains are what create the open, airy threads of the web.
At each corner, you work a special increase using chains of 3, 6 and 9 in turn. This rhythm keeps the corners square while the web spreads evenly outward. Once you’ve worked through the first few rounds, the pattern repeats, and you’ll quickly feel the steady 3, 6, 9 rhythm in your hands.
It’s a joy to watch. With every round, the web grows larger and more dramatic, until you’re holding a lacy panel that looks like it was spun by a very stylish spider.
Because the stitches are tall and the chains are long, the panels grow much faster than you might expect. A few relaxed evenings are often all it takes to finish the front and back, which makes this a wonderfully achievable garment, even if Halloween is just around the corner.
Your New Favorite Halloween Outfit
This top was made for Halloween, but it doesn’t have to stay there. For a spooky party, pair it with a black skirt, fishnet tights and boots. For an everyday gothic look, wear it over a fitted tank with dark jeans. In summer, the open lace works beautifully as a beach cover up or festival layer.
Complete your look with our Crochet Spider Web Earrings Pattern, or browse more wearable makes in our Crochet Top Pattern collection.
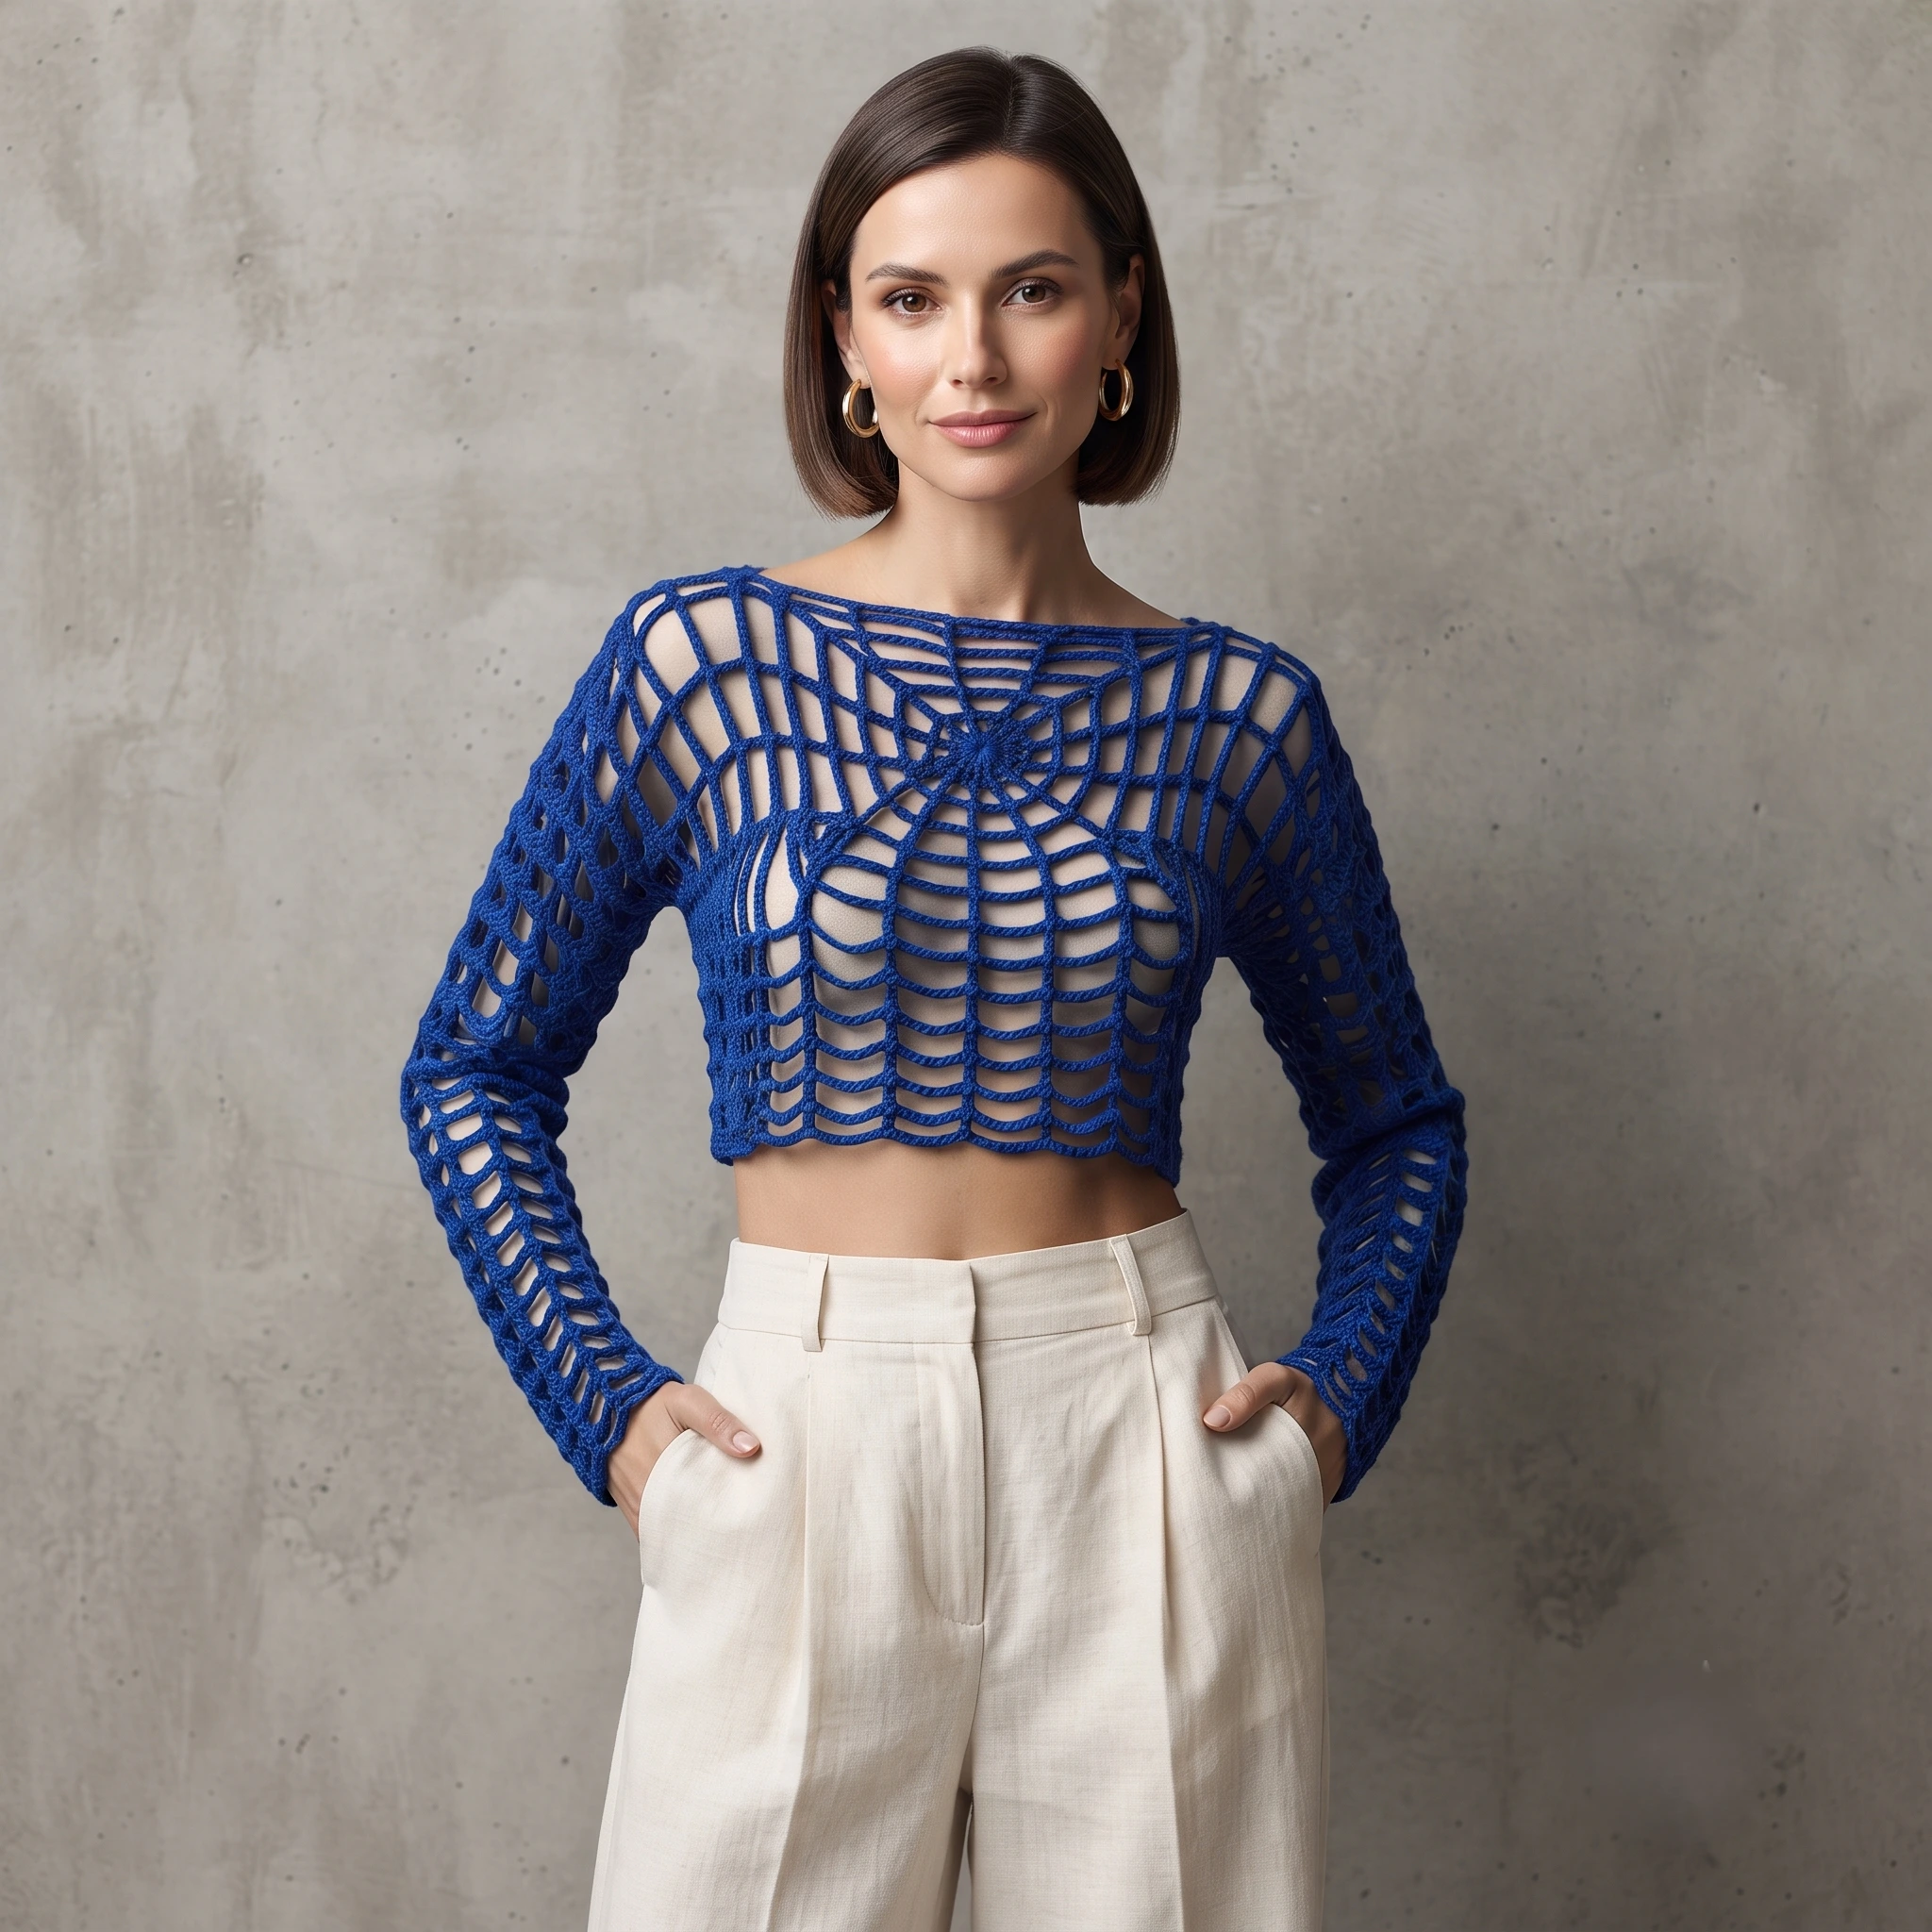
Sleeves Without a Single Seam
Once your front and back panels are joined at the shoulders and sides, the sleeves are worked directly from the armholes in rounds. That means no separate sleeve pieces and no sleeve seams to sew, just a smooth, continuous web pattern flowing from the body into the arms.
You simply attach your yarn at the top of the armhole and work around, repeating the same round until the sleeve reaches the length you love. The sample has 23 rounds for long, dramatic sleeves, but you can stop sooner for elbow length or short sleeves.
Fitting and Seaming Your Top
When both panels are finished, lay them together and try the top on. Use stitch markers or pins to mark the neckline and armholes. This try on stage is where the made to measure approach really shines, because you can adjust everything before a single seam is sewn.
Sew the shoulder seams first, working from the outer corners towards the neck, then try it on again to check the fit. Next, sew the side seams from the bottom up towards the armholes. Any seaming method works. A simple whip stitch with a tapestry needle and matching yarn is quick and nearly invisible in the lacy fabric.
Is This Top Right for You?
This pattern is rated Advanced Beginner. If you’re comfortable with chains, double crochet and triple crochet, and you’re ready to try a double triple crochet, you’ll be able to make it. The stitches themselves are simple. What takes a little focus is keeping track of the 3, 6, 9 corner rhythm.
If it’s your first garment, you’ll find the made to measure approach reassuring, since you can check the fit at every stage. And if you’ve made tops before, you’ll love how quickly the open lace grows.
Make It Your Own
Change the length for a completely different look. Stop early for a cropped top, or keep going for a longer tunic. Adjust the sleeves too, from dramatic long sleeves to short or cap sleeves, or skip them for a sleeveless vest.
Color can transform the mood. A white or silver web feels ethereal and wintry, while red or orange creates a bold, fiery Halloween statement. You could even work the top in a glow in the dark yarn for a party showstopper.
When Something Doesn’t Look Quite Right
If your panel starts to curl or ripple, check your corner increases, since the 3, 6, 9 rhythm keeps the web flat and square. If the web looks uneven, remember that from Round 2 onwards, the tall stitches always go into the tall stitches of the round before.
If the top feels too tight, add the optional side panels. If it feels loose, work fewer rounds before switching to the rectangle. And once it’s finished, a gentle steam block helps the lace open up and drape beautifully.
Keep Learning
Building your skills? These guides pair beautifully with this pattern: How to Block Crochet, Why Crochet Gets Wider or Curls and How to Change Colors in Crochet.
A Few Tips Before You Start
- Take your measurements carefully before you begin.
- Mark your corners with stitch markers to keep the 3, 6, 9 rhythm on track.
- Hold each panel up to your body as it grows.
- Try the top on before sewing any seams.
- Steam block the finished top for the best drape.
Frequently Asked Questions
Pick up your hook and let’s bring your next crochet project to life!