Crochet Cable Hat Pattern Free Diamond Cable Beanie
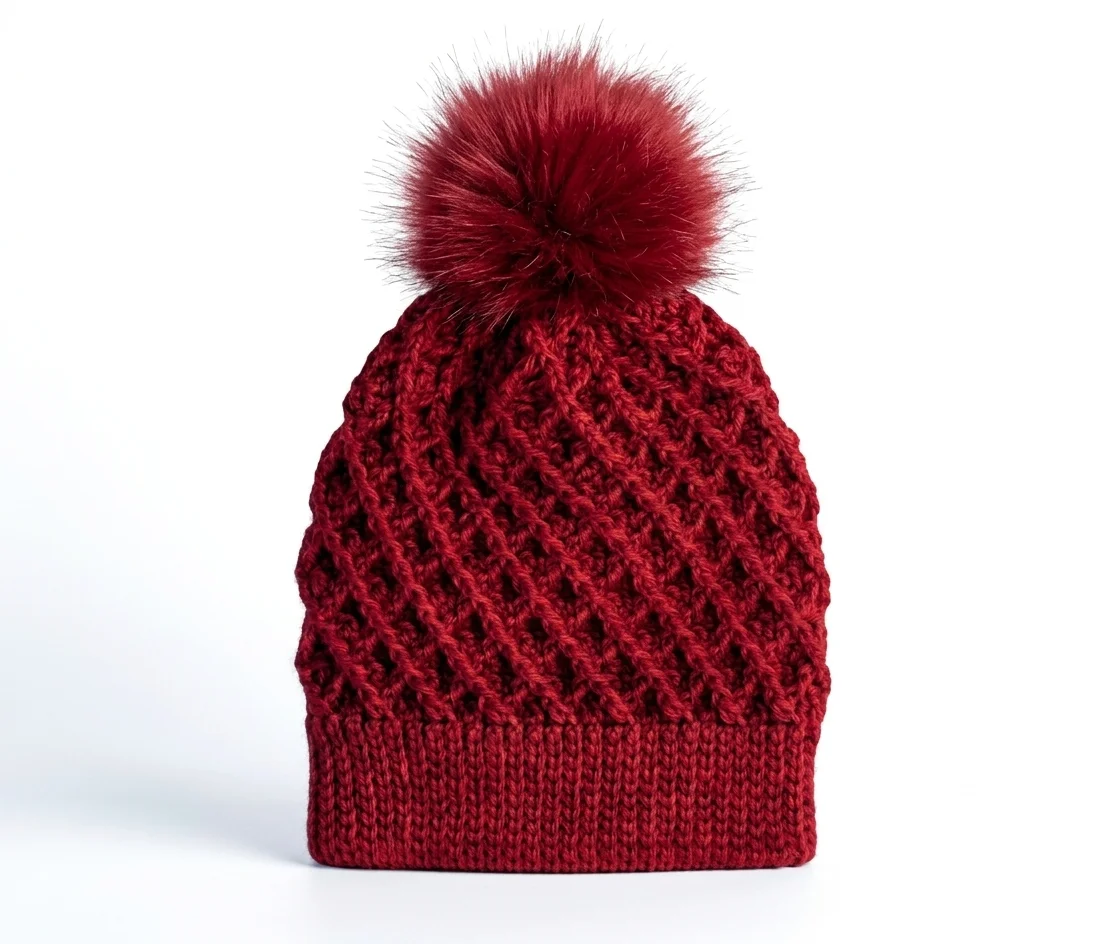
This is the hat people will swear you knitted. Our free crochet cable hat pattern weaves raised cables into a band of interlocking diamonds that wraps all the way around the crown, sitting above a neat, stretchy ribbed brim. Top it with a pom pom, and you have a classic winter hat with real heirloom charm, in four sizes from baby to adult.
Why You’ll Love This Crochet Cable Hat
Cables are one of the most beautiful textures in crochet, and a hat is the perfect place to show them off. They frame the face, catch the light and give a simple beanie a rich, luxurious look that feels special every time you put it on.
In this design, front post double crochets travel across the hat and cross over each other every few rounds. As they meet and part, they form a continuous pattern of diamonds that wraps the crown. It looks intricate, yet the whole cable section comes from repeating just four rounds.
The ribbed brim adds the perfect finishing touch. It’s made from simple slip stitches worked in the back loops, which creates a snug, stretchy band that keeps ears warm and holds the hat in place.
What’s Inside the Free Crochet Cable Hat Pattern
Your PDF download is thorough and easy to follow:
- Four sizes, Baby, Toddler, Child and Adult, with finished circumference and height
- Yarn amounts for each size, including the pom pom
- A crochet chart showing the cable repeat, with a symbol key
- Step by step instructions for the ribbed brim
- Round by round cable instructions with stitch counts for every size
- Size specific crown decreases
- Instructions for closing the crown and adding a pom pom
- US crochet terms throughout
Materials for Your Cable Hat
| Material | Details |
|---|---|
| Yarn | Worsted weight (Category 4) |
| Yarn amount | Baby 137yd · Toddler 165yd · Child 195yd · Adult 229yd (includes pom pom) |
| Crochet hook | 5mm (US H/8) |
| Gauge | Brim: 10 sts and 16 rows = 2in · Cable section: 8 sts and 6 rows = 2in |
| Notions | Tapestry needle, scissors, optional pom pom |
| Skill level | Intermediate |
| Crochet terms | US |
Cables shine in smooth, light coloured yarn, where every raised stitch casts a soft shadow. Cream, oatmeal, heather grey and soft blush are timeless choices. A wool blend gives extra warmth and springy stitch definition, while acrylic is easy to wash, which is ideal for children’s hats.
Find the Right Size
| Size | Age | Finished circumference | Height |
|---|---|---|---|
| Baby | 6 to 12 months | 17in | 6½in |
| Toddler | 1 to 3 years | 18in | 7½in |
| Child | 3 to 10 years | 19in | 8in |
| Adult | Adult | 20in | 9in |
The ribbed brim stretches comfortably, so the hat fits snugly without being tight. Measuring the head before you start is the easiest way to choose the perfect size.
The Ribbed Brim Comes First
Unlike most hats, this one starts with the brim, worked flat and sideways. You chain a short length for your size, then work rows of slip stitches into the back loops only. Row after row, a stretchy ribbed band grows.
When the band reaches the right length for your size, you join the ends into a ring. Then you turn the ring on its side and work the first round of the hat straight into the tops of the ribs. It’s a lovely technique that gives you a professional looking, knit style brim with no seams to sew afterwards.
How the Diamond Cables Form
The cable section is worked in rounds, and it’s built from front post double crochets. These are worked around the stems of the stitches below, so they rise up from the fabric as raised columns.
The magic happens when those columns cross. In some rounds, you skip a stitch, work a front post around the next one, then go back and work around the skipped stitch. That small swap makes the raised stitches lean towards each other and cross, and over four rounds they form a diamond. Repeating those four rounds builds a continuous band of diamonds all the way up the hat.
The included chart shows the cable repeat as a visual map. Even if you prefer written instructions, it’s a great way to see how the diamonds connect before you begin.
Matching Hats for the Whole Family
With four sizes in one pattern, this hat is perfect for making matching sets. Imagine a whole family walking through the snow in coordinating cable hats, or a baby and parent set as a thoughtful new arrival gift.
These hats also make beautiful Christmas presents, especially in classic cream or festive red. Looking for something simpler? Try our Crochet Ribbed Beanie Pattern in the same four sizes, or our beginner friendly Crochet Beanie Pattern.

Why Cables Make a Warmer Hat
Cables aren’t just beautiful. They’re practical too. Every crossed cable layers stitches over one another, creating a thicker, denser fabric than plain double crochet. That extra depth traps warm air and blocks the wind, so a cable hat feels noticeably cosier on cold days.
Combined with the snug ribbed brim, this makes the hat a genuinely warm winter piece, not just a pretty one. It’s especially welcome for children waiting at the school gate or for long winter walks, when warm ears make all the difference.
Shaping the Crown and Adding a Pom Pom
When the cable section reaches the right height for your size, you work a single decrease round that combines front post decreases with regular decreases. This keeps the cable texture flowing neatly into the crown.
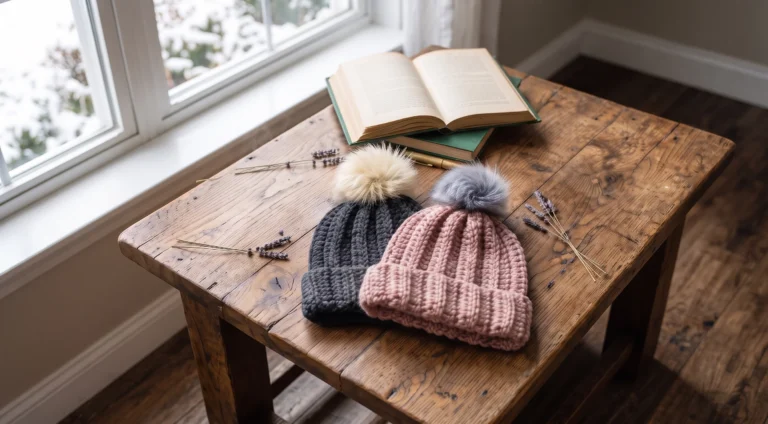
Then you thread a tapestry needle through every second stitch around the top and pull it firmly to gather the crown closed. Finally, add a pom pom for a playful finish. Yarn pom poms are fun to make and match perfectly, while a faux fur pom pom adds a stylish, modern touch.
Is This Hat Right for You?
This pattern is rated Intermediate. You’ll need to be comfortable with double crochet and ready to work front post double crochet, both around single stitches and as crossed pairs. Following four size specific numbers in each round also takes a little focus.
If you’re new to post stitches, practise a few on a small swatch first. Once the crossing motion clicks, the four round repeat becomes surprisingly relaxing. And if you’d like a gentler warm up, our Crochet Ribbed Beanie Pattern is a lovely stepping stone.
Make It Your Own
Colour makes a big difference to cable hats. Light, solid colours show the diamonds most clearly, while a heathered yarn adds subtle depth. For a bold look, try a deep forest green, rust or navy.
You can adjust the fit too. Add more cable repeats before the crown decreases for a taller, slouchier hat, or fold the brim up by working it a little wider. A contrasting pom pom is an easy way to personalise each hat in a family set.
When Something Doesn’t Look Quite Right
If your cables look flat, check that you’re working around the post of each stitch rather than into its top loops. If the diamonds look uneven, make sure you’re crossing the stitches in the right order on each round.
If the hat feels tight, check your gauge in the cable section, since cables naturally pull the fabric in. Going up a hook size can help. And if the brim feels loose, work a few fewer rows before joining it into a ring.
Caring for Your Hat
Check your yarn label for washing instructions. Most wool blend and acrylic hats are happiest hand washed in cool water. Press out the water gently, reshape the hat and let it dry flat. If you’ve added a faux fur pom pom, remove it before washing if it’s detachable.
Keep Learning
Want to master the techniques in this hat? These guides pair beautifully with this pattern: How to Crochet Cables With Post Stitches, Why Crochet Gets Wider or Curls and How Much to Charge for Crochet Items.
A Few Tips Before You Start
- Highlight your size throughout the PDF.
- Practise front post double crochet before starting the cables.
- Check your stitch count at the end of each round.
- Look at the chart to understand the diamond repeat.
- Gather the crown firmly for a neat finish.
Frequently Asked Questions

Pick up your hook and let’s bring your next crochet project to life!