Front Post Double Crochet Made Easy With Back Post Stitches and Cables
If a pattern has ever told you to work around the post and left you puzzled, you’re in good company. This guide explains front post double crochet and back post double crochet simply, then shows you how to turn them into ribbing and cables.
What Is a Front Post Double Crochet
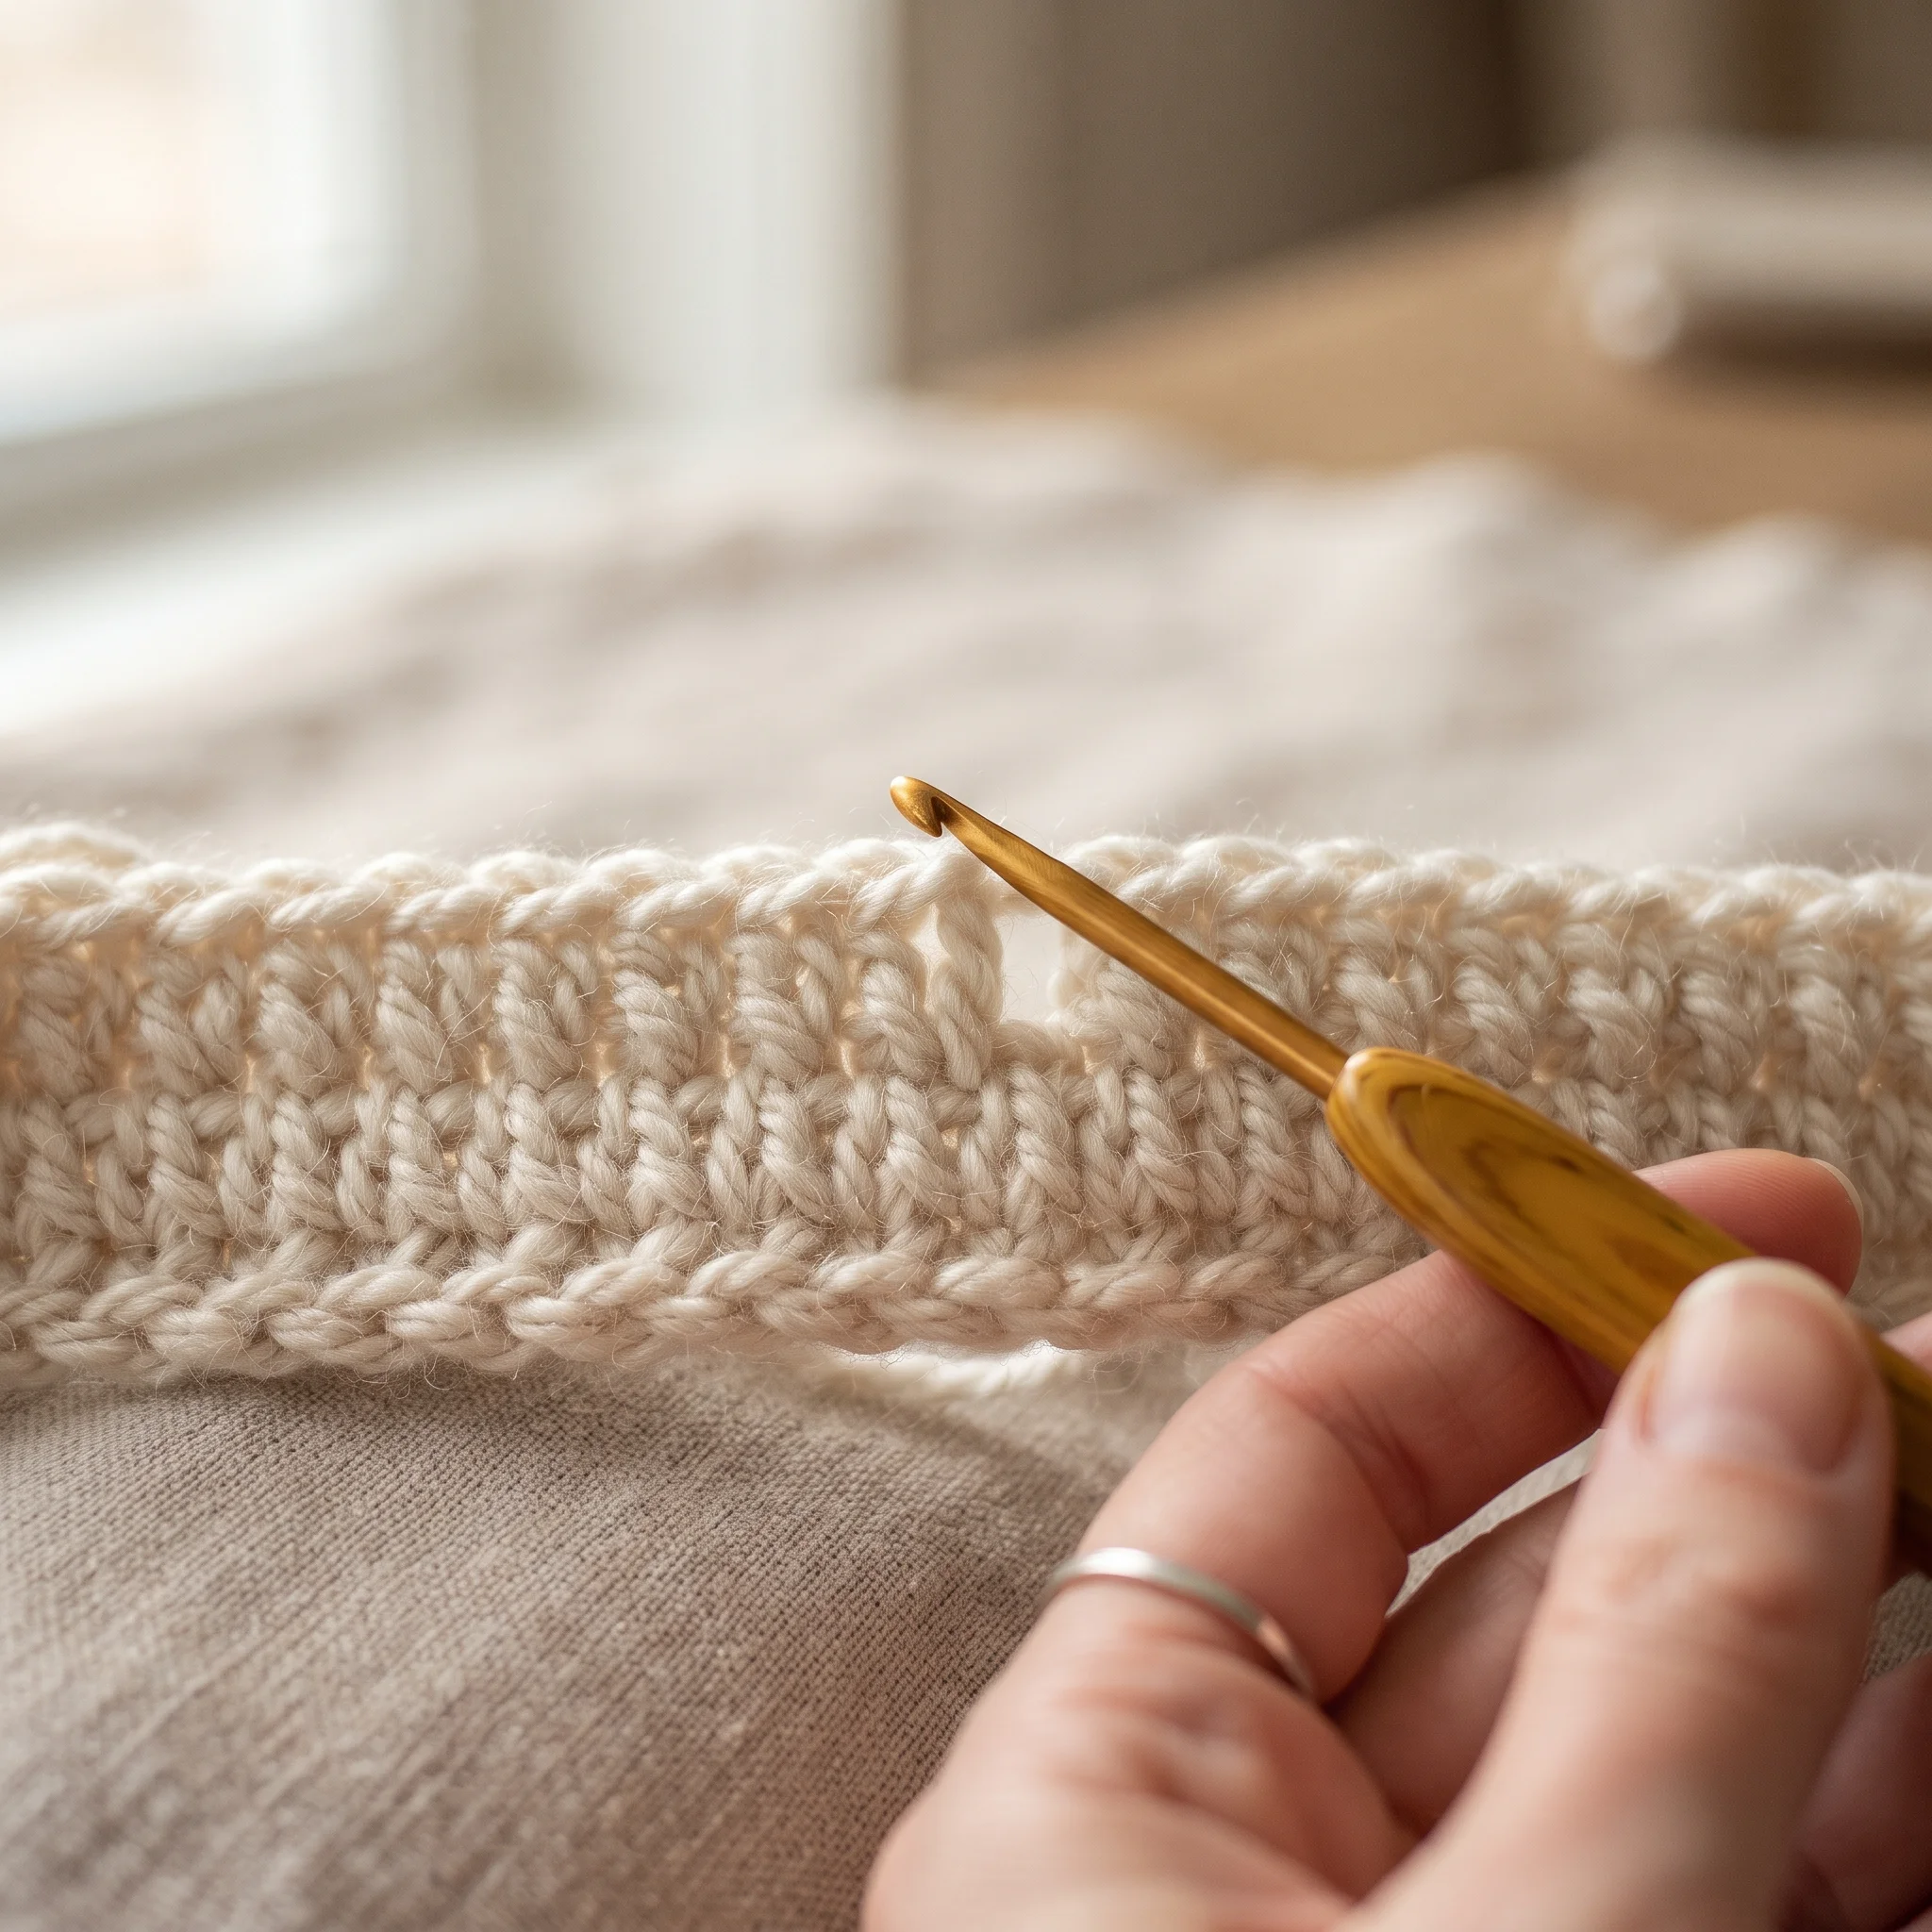
A front post double crochet is a double crochet worked around the post of a stitch instead of into its top loops. To work it, yarn over, insert your hook from front to back to front around the post of the next stitch, then finish it like a normal double crochet. The stitch pops forward on the side facing you.
A back post double crochet is the same stitch worked from the other side. Insert your hook from back to front to back around the post. The stitch sinks backward, away from you.
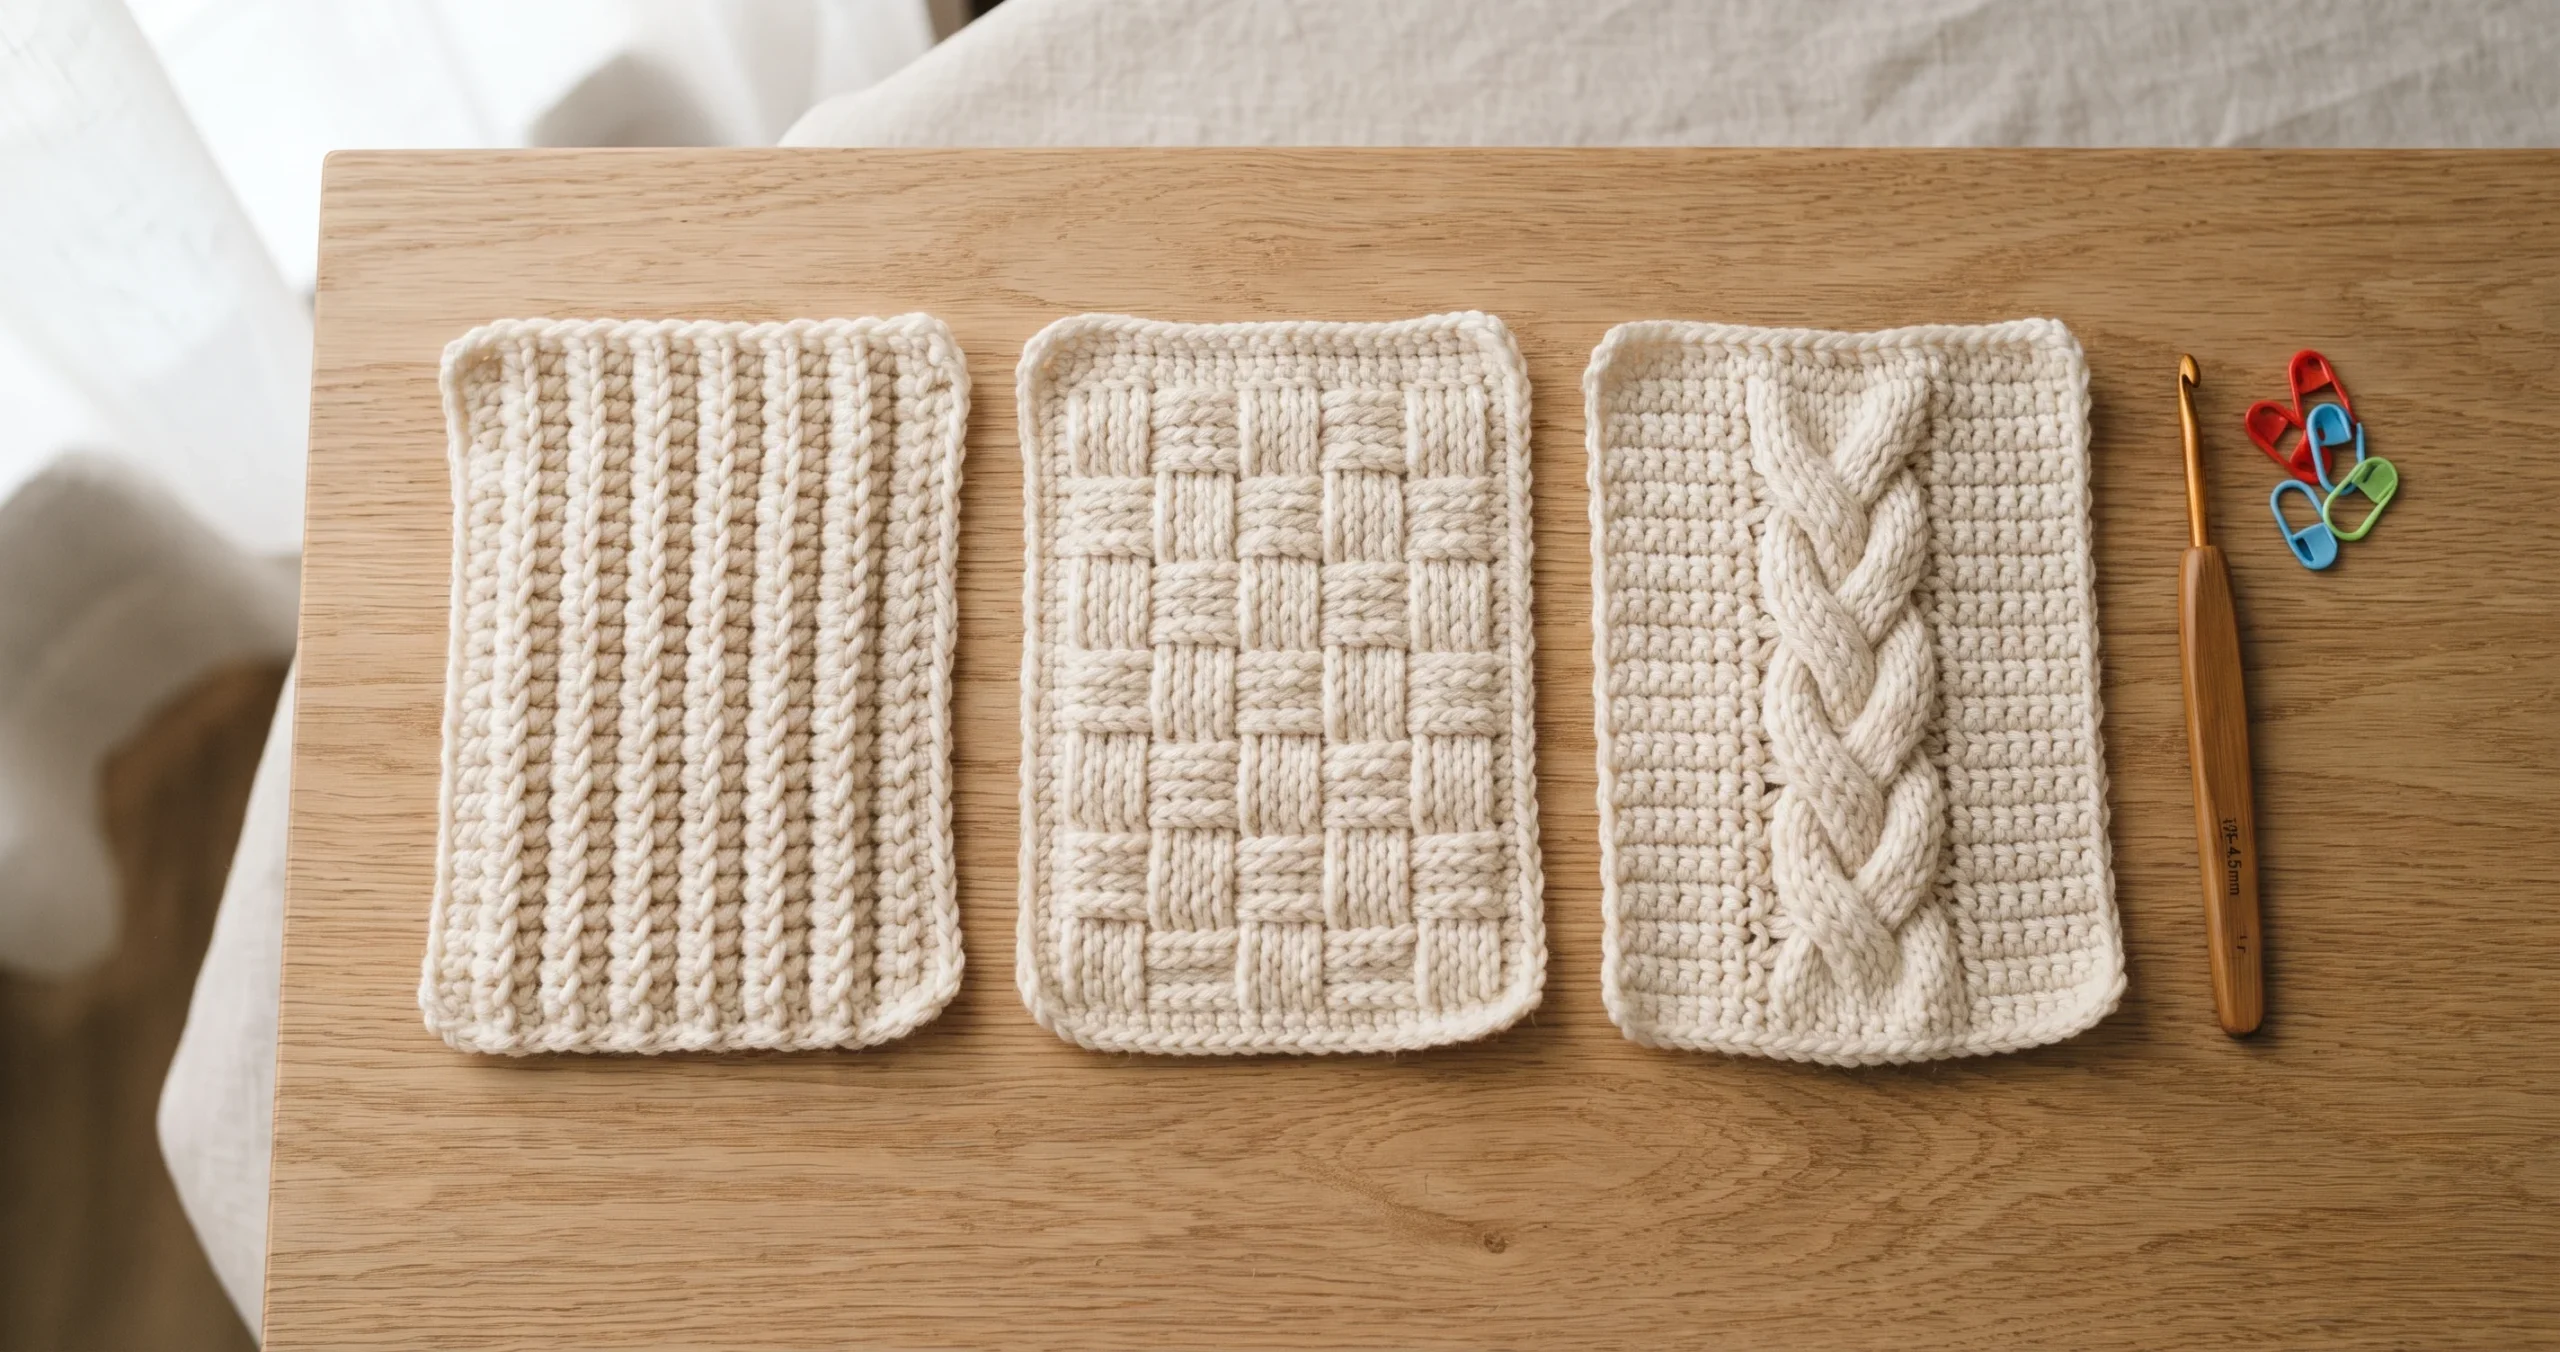
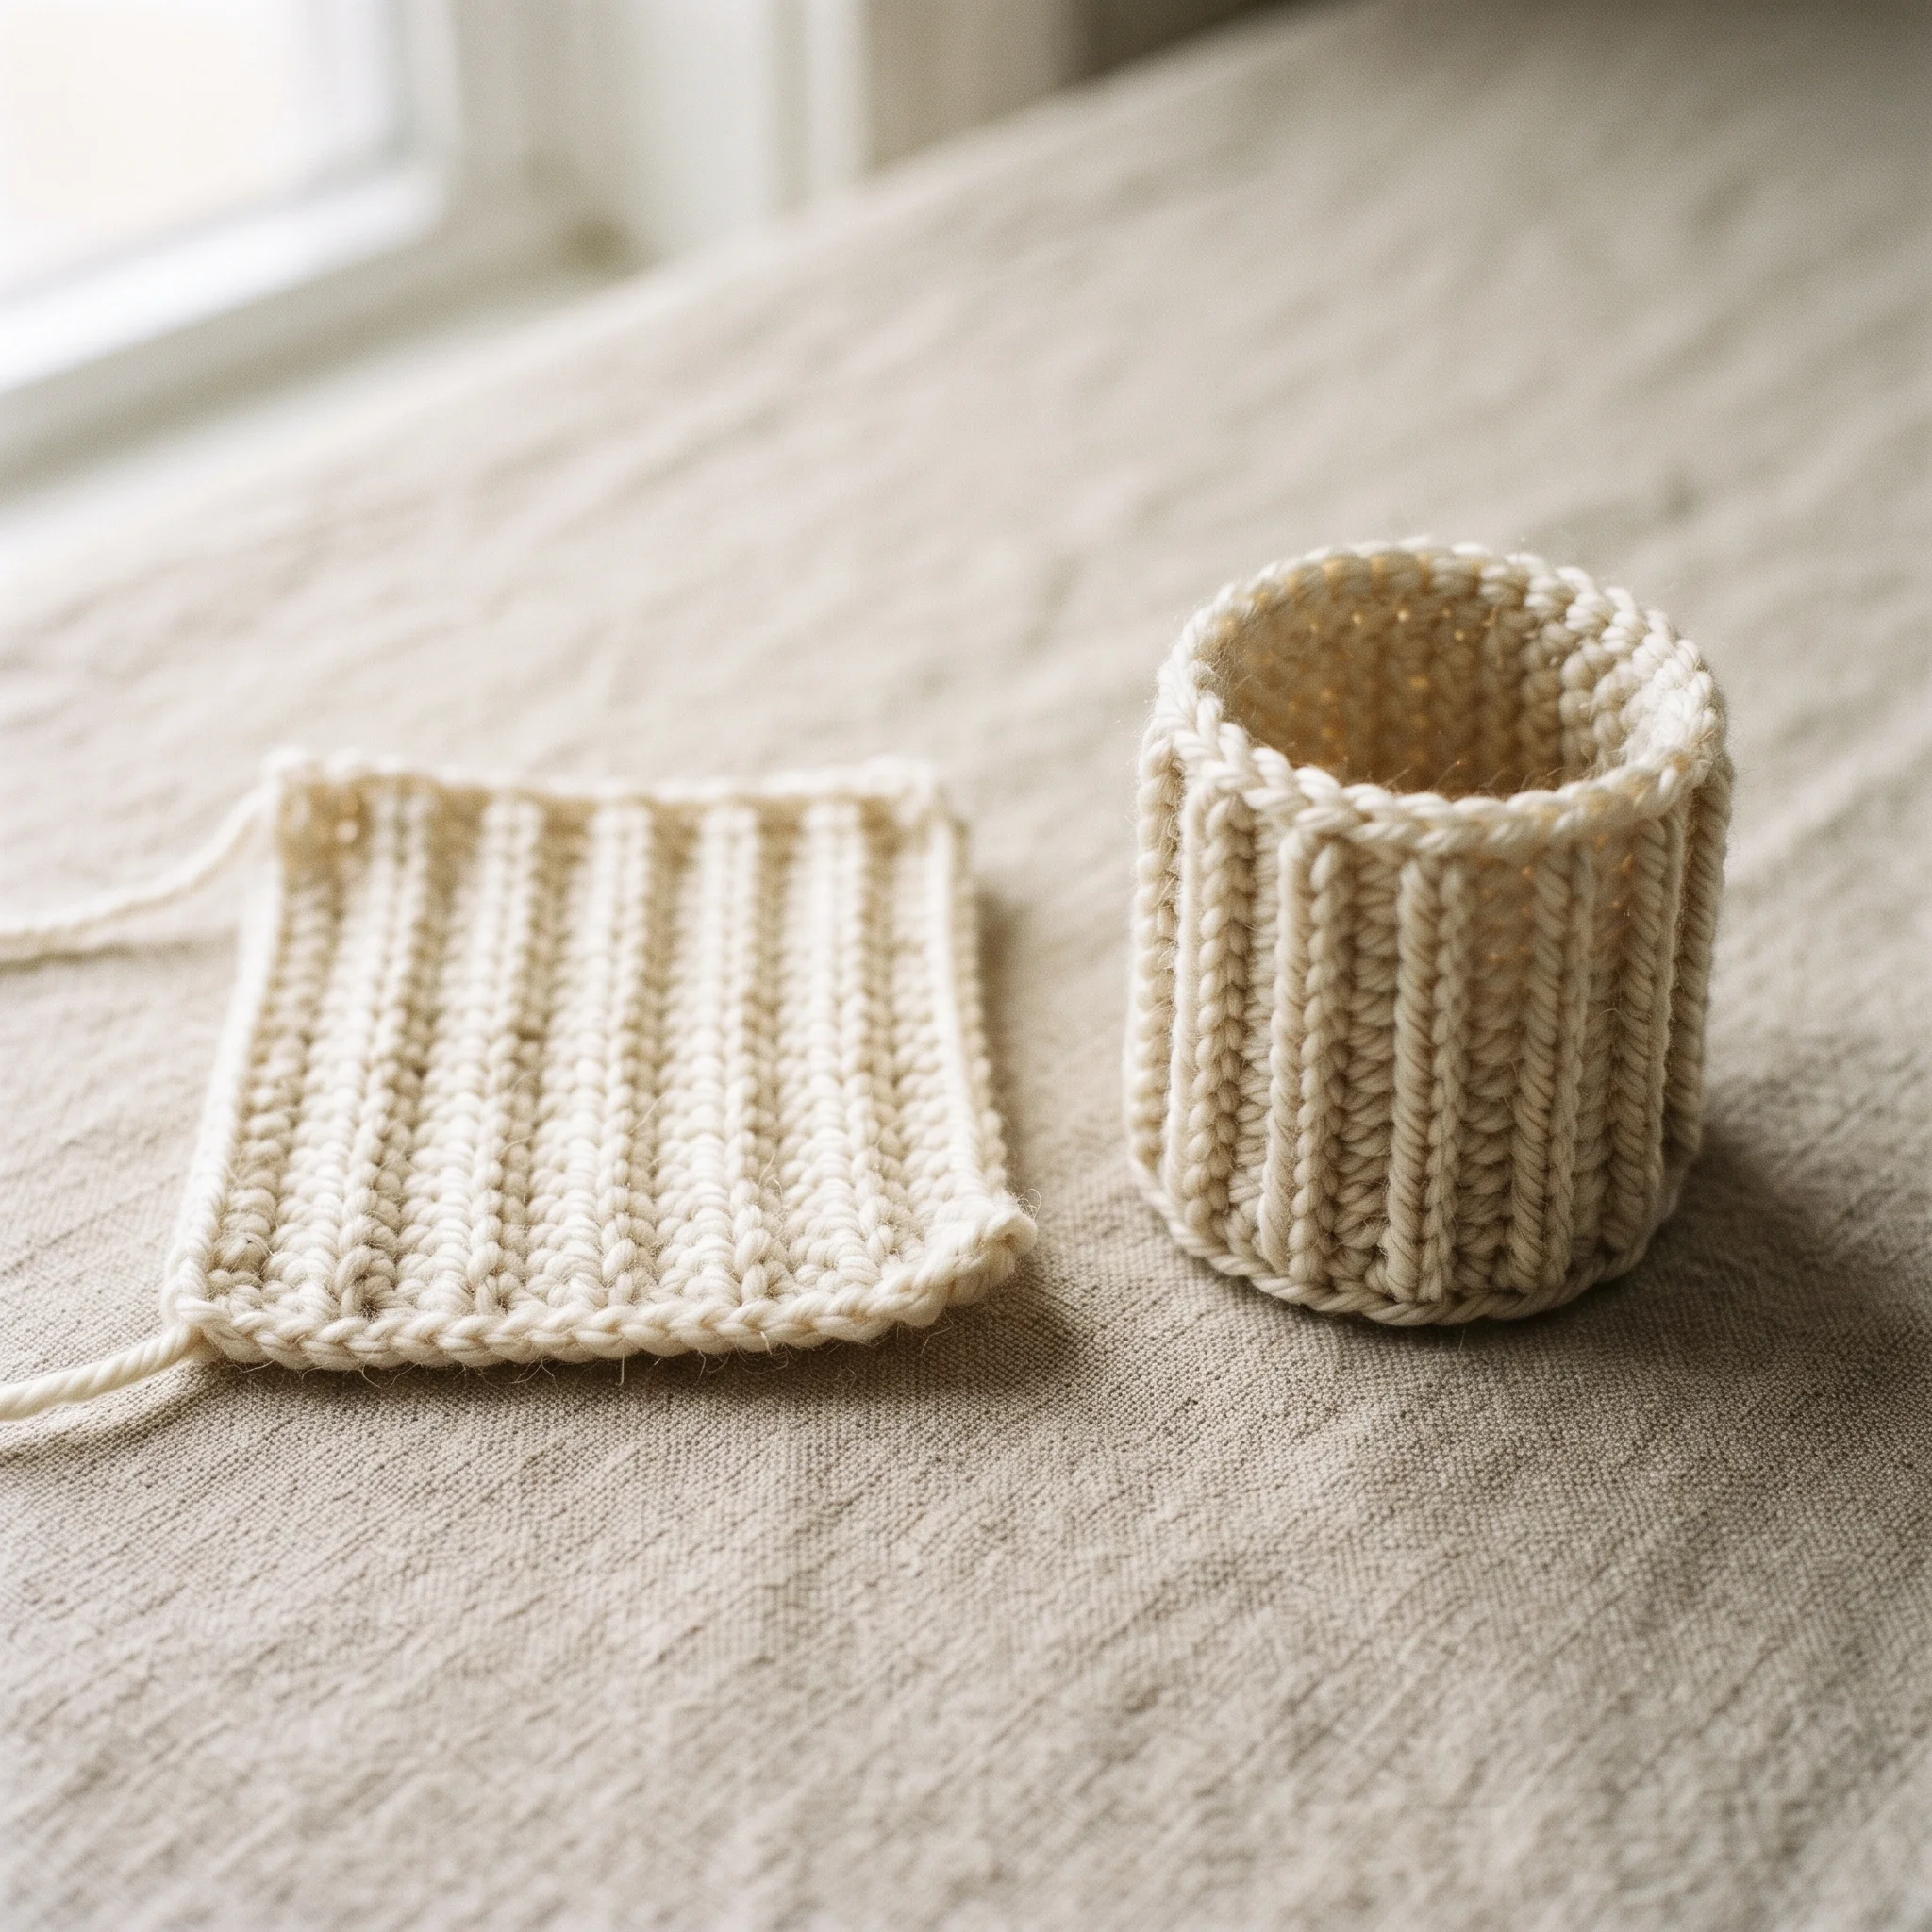
Alternate them to make ribbing. Front post, back post, repeated across the row, creates stretchy, knit look ribbing for cuffs, brims and hems.
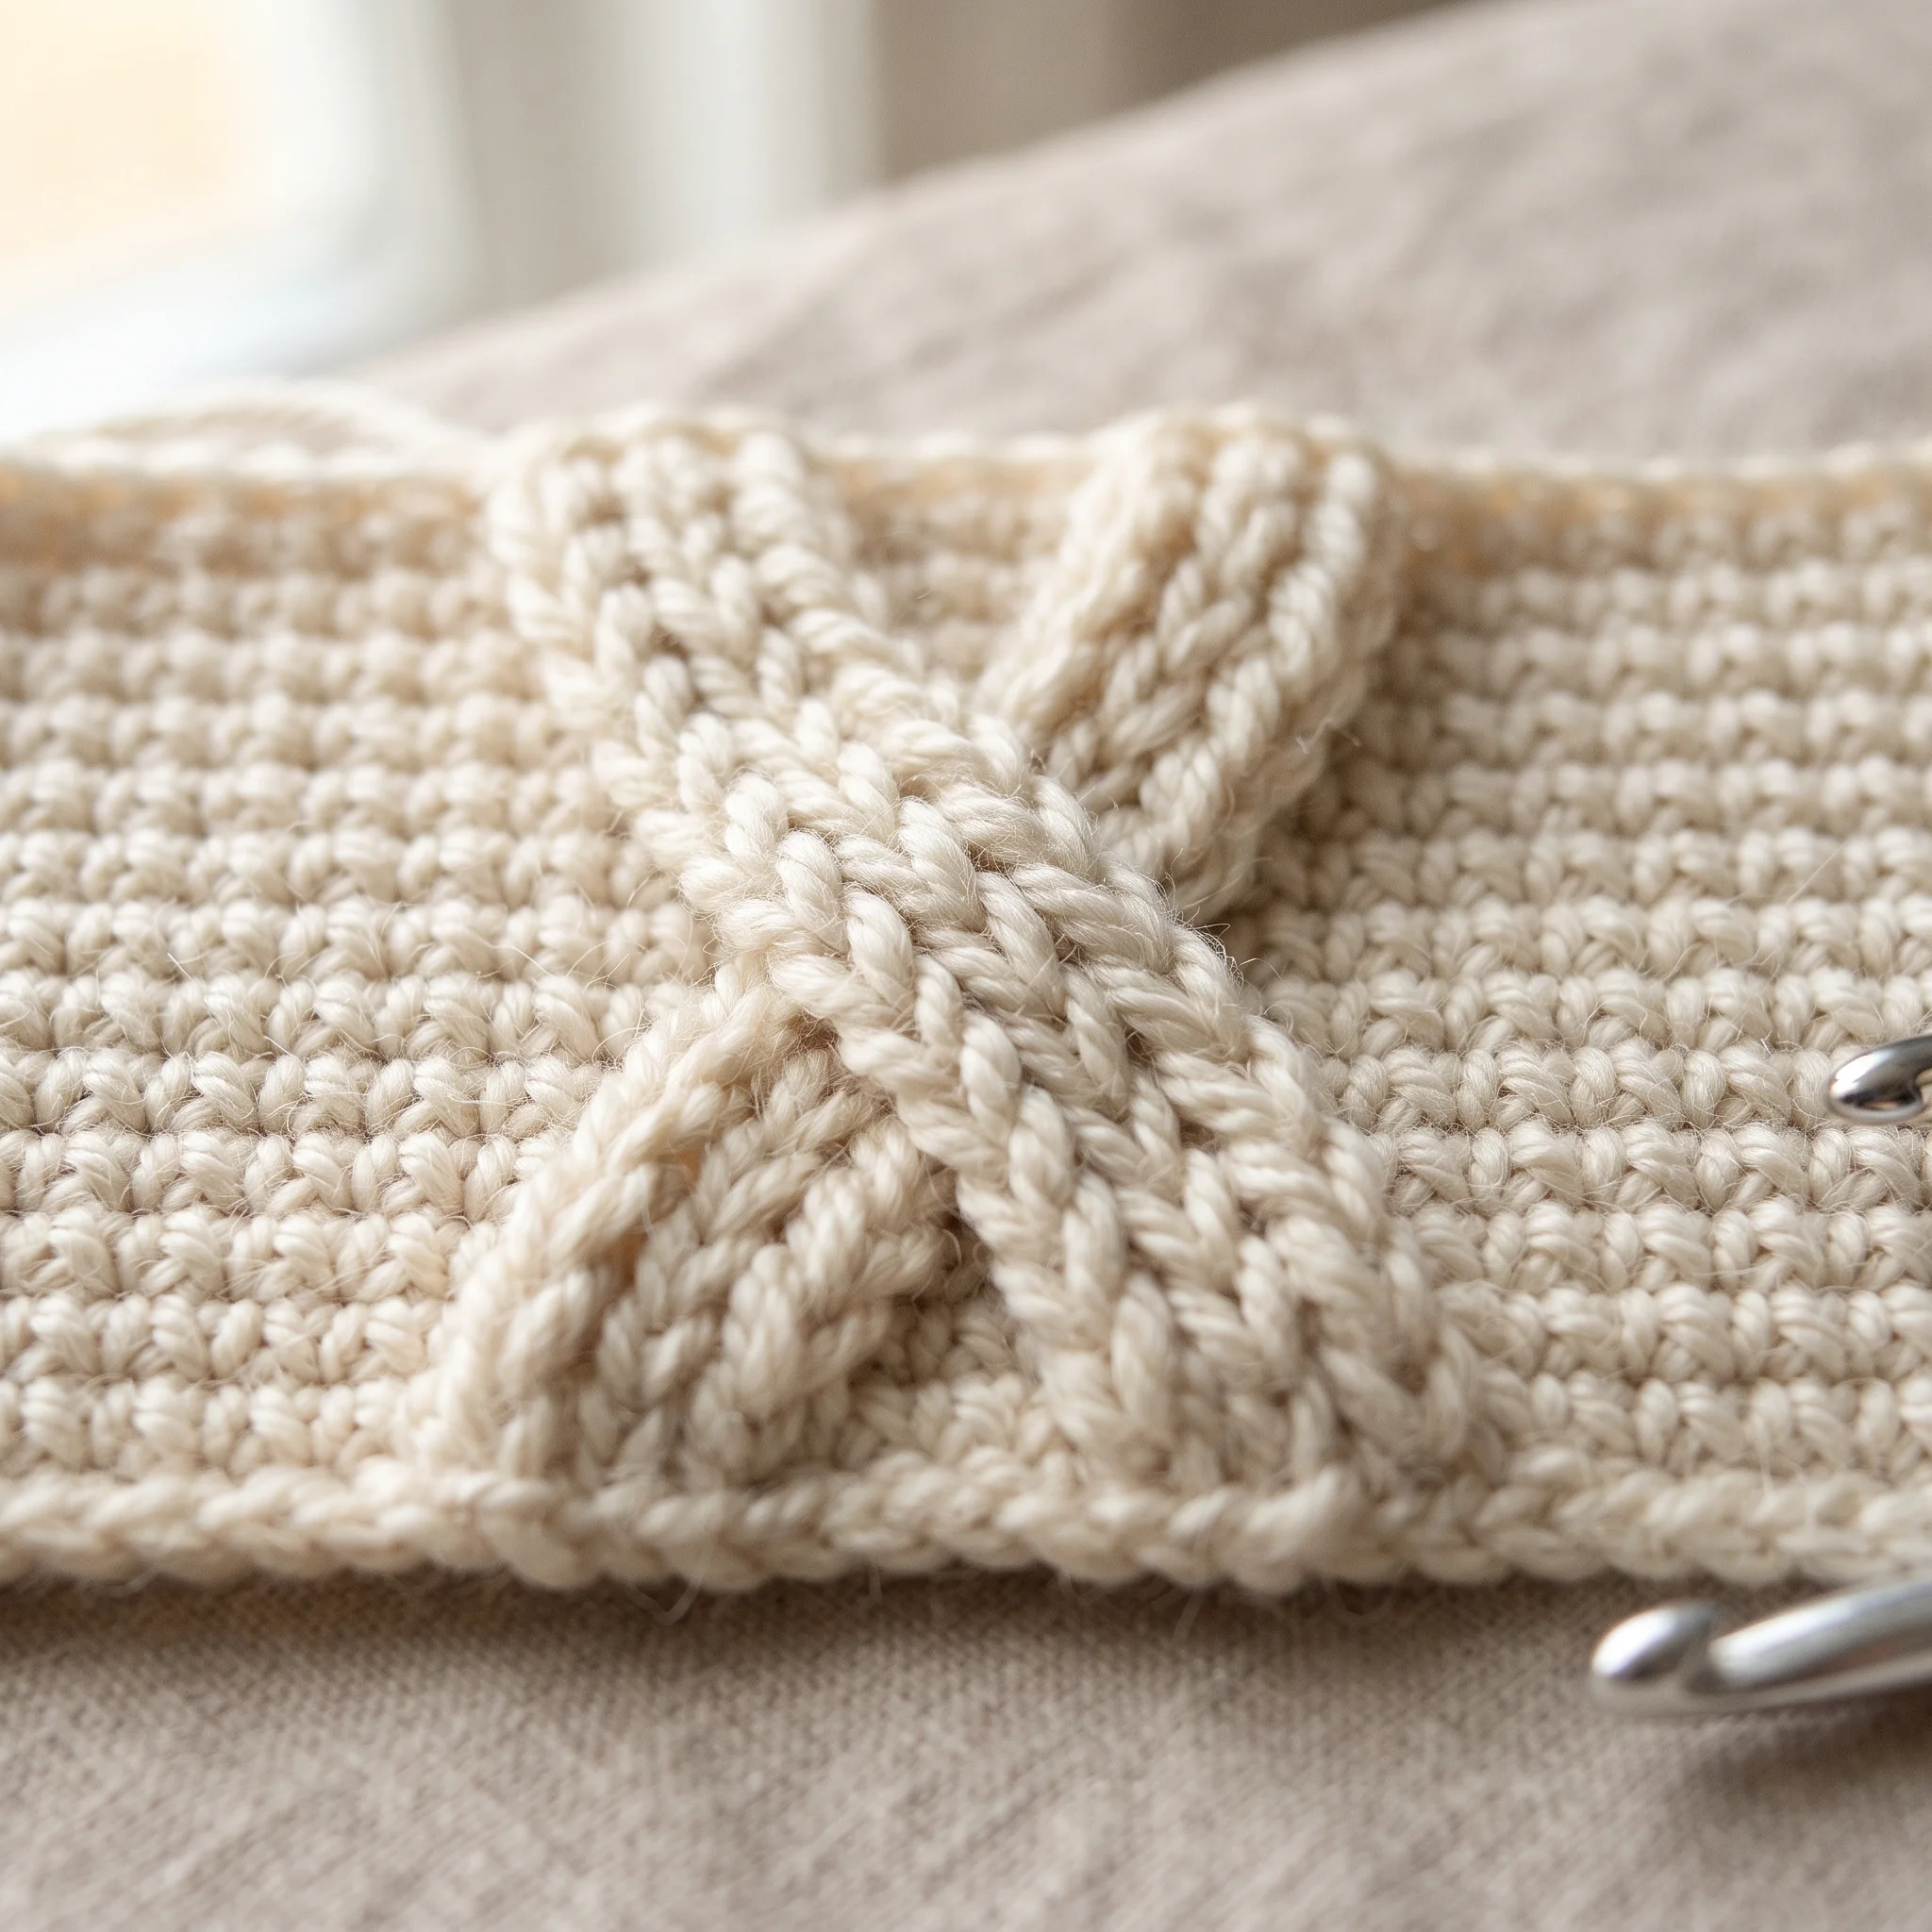
Cross them to make cables. Skip a few post stitches, work the next ones, then go back and work the skipped stitches in front of or behind them. The columns cross over, creating a twisted cable.
Remember the flip rule. When you work in rows and turn your work, a front post stitch on the wrong side looks like a back post stitch on the right side. That’s why patterns often switch between front and back post on alternate rows.
Expect some pull in. Post stitches and cables make fabric thicker and slightly narrower, so swatch first and consider a larger hook.
Below you’ll find step by step instructions, how to find the post, ribbing, cables, rows versus rounds, and fixes for flat cables, gaps and wonky edges.
Maybe you’ve seen a crochet cable sweater and thought, I could never make that. Or you’ve started a pattern that says “FPdc around the next st” and stared at your work wondering where on earth the post is.
You’re not alone. Post stitches are one of the most common stumbling blocks for crocheters moving beyond the basics. People ask which post to use, why their second row of back post stitches looks wrong, what “work in front of the stitches just made” means, and why their cables look flat or tangled.
Here’s the reassuring part: front post double crochet and back post double crochet are just double crochet stitches worked in a different place. If you can make a double crochet, you can make a post stitch. And once you can make post stitches, ribbing, basketweave and beautiful cables are all within reach.
This guide explains everything in plain, simple steps, with the troubleshooting tips most tutorials leave out.
What a Post Stitch Is
Every crochet stitch taller than a slip stitch has two main parts.
The top is the V shape of two loops sitting on top of the stitch. Normally, you work your next stitch into these loops.
The post is the vertical body of the stitch, the upright column between the base and the top. In a double crochet, the post is tall and easy to see.
A post stitch is worked around that vertical post instead of into the top loops. Because you’re wrapping around the stitch rather than sitting on top of it, the new stitch is pushed forward or backward. That’s what creates the raised and recessed texture.
Post stitches can be any height: front post single crochet, front post half double crochet, front post double crochet or front post treble crochet. Front post double crochet is the most common, so we’ll start there.
How to Find the Post
Finding the post is half the battle, especially at first.
Look below the V. Find the V at the top of the next stitch, then follow it down. The upright column directly below is the post.
Turn your work slightly. Tilting the fabric towards you makes the posts stand out more clearly, especially in dark yarn.
Work around the stitch from the row below. In most patterns, you work around the post of the stitch in the previous row, which sits directly below the stitch you’d normally work into.
Practise on a tall stitch. Double crochet posts are much easier to see than single crochet posts. That’s why most post stitch practice starts with a few rows of double crochet.
Use good light. Post stitches are much easier in bright, direct light and with a smooth, light colored yarn.
How to Crochet Front Post Double Crochet
Before you start, crochet a few rows of plain double crochet, so you have posts to work around.
Step 1. Yarn over, just as you would for a normal double crochet.
Step 2. Instead of inserting your hook into the top of the next stitch, insert it from the front to the back, to the right of the post (to the left if you’re left handed).
Step 3. Bring the hook back to the front on the other side of the post. Your hook now sits behind the post, with the post lying across the front of your hook.
Step 4. Yarn over and pull up a loop around the post. You now have three loops on your hook.
Step 5. Yarn over and pull through two loops. Yarn over again and pull through the last two loops.
That’s one front post double crochet, and you’ve just learned the most important stitch in this guide. Look at your work: the new stitch stands forward, raised slightly above the rest of the fabric. Make several in a row and you’ll see a raised column begin to form.
A memory trick: when you insert your hook for a front post stitch, the post you’re wrapping around sits in front of your hook.
How to Crochet Back Post Double Crochet
Back post double crochet is the mirror image of front post.
Step 1. Yarn over.
Step 2. Bring your hook to the back of the work and insert it from the back to the front, to the right of the post.
Step 3. Bring the hook to the back again on the other side of the post. Now the post sits behind your hook.
Step 4. Yarn over and pull up a loop around the post.
Step 5. Finish as a normal double crochet: yarn over, pull through two, yarn over, pull through two.
The new stitch sinks backward and creates a recessed column on the side facing you. On the other side of the fabric, it looks like a raised front post stitch.
Tip: many crocheters find back post stitches awkward at first because the hook moves behind the work. Hold the fabric slightly towards you and take it slowly. After a dozen or so stitches, it feels natural.
Other Post Stitch Heights
Front post double crochet is the most common, but post stitches come in several heights.
Front post single crochet is short and creates a subtle texture.
Front post half double crochet adds gentle ridges and is used in textured fabrics like our crochet pumpkin scrunchie pattern, where alternating front and back post half double crochets form the pumpkin’s grooves.
Front post treble crochet is tall and is often used for cables, since its height lets it reach up and across other stitches.
Match the height to the pattern. A front post single crochet, front post half double crochet and front post double crochet are all different heights. If your stitches look too short or too tall, check that you’re working the height your pattern asks for.
The Flip Rule for Rows and Rounds
This is the single most important idea for understanding post stitches, and the one that confuses people most.
In rounds, you always work with the same side facing you. A front post stitch is raised on the front, every round. If you want a raised column, you work front post stitches on top of front post stitches.
In rows, you turn your work at the end of every row. That means you’re looking at the back of the fabric on every other row.
Here’s the key: a front post stitch worked on the wrong side looks like a back post stitch on the right side. And a back post stitch worked on the wrong side looks like a front post stitch on the right side.
So in rows, to keep a column raised on the right side, you:
- Work front post around it on right side rows
- Work back post around it on wrong side rows
This is why so many patterns alternate between front and back post on alternate rows. If your second row of post stitches “doesn’t look right,” the flip rule is almost always the reason.
Easy check: look at the column you’re working around. If it’s raised towards you, work a front post stitch to keep it raised. If it’s sinking away from you, work a back post stitch.
Post Stitch Abbreviations Made Simple
Post stitch patterns use a lot of short codes. Here are the ones you’ll see most often, in US terms.
| Abbreviation | Stitch | What it does |
|---|---|---|
| FPsc | Front post single crochet | Short, subtle raised texture |
| FPhdc | Front post half double crochet | Gentle raised ridges |
| FPdc | Front post double crochet | Raised columns, ribbing, cables |
| BPdc | Back post double crochet | Recessed columns, ribbing |
| FPtr | Front post treble crochet | Tall raised stitch, often for cable crossings |
| BPtr | Back post treble crochet | Tall recessed stitch |
| FPdc2tog | Front post double crochet two together | A post stitch decrease, used in crown shaping |
UK terms are different. In UK patterns, a US double crochet is called a treble, so a front post double crochet becomes a front post treble. Always check which terms your pattern uses before you start.
Making Crochet Ribbing With Post Stitches
Post stitch ribbing is stretchy, neat and looks remarkably like knitted ribbing. It’s perfect for hat brims, cuffs, hems and blanket borders.
One by one ribbing. Alternate one front post double crochet and one back post double crochet across the row. On the next row, work front post around the raised stitches and back post around the recessed ones. Columns of raised and recessed stitches form.
Two by two ribbing. Work two front post stitches, then two back post stitches, and repeat. This creates wider, bolder ribs.
In rounds, ribbing is even easier. Work front post around front post stitches and back post around back post stitches, every round.
Ribbing tips
- Ribbing pulls in, which is exactly what you want for a snug brim or cuff.
- Keep your tension even so the ribs line up neatly.
- Start with an even number of stitches for one by one ribbing, or a multiple of four for two by two.
Basketweave and Other Post Stitch Textures
Ribbing and cables are just the start. Post stitches create many beautiful textures.
Basketweave. Work blocks of front post stitches next to blocks of back post stitches, then swap them every few rows. The blocks look like woven strips, perfect for cosy blankets and cushions.
Waffle stitch. Alternating front post stitches with regular double crochets creates a grid of deep, squishy squares that’s wonderful for dishcloths and blankets.
Raised stripes. A single row of front post stitches across a plain fabric creates a raised line, a simple way to add detail to a hat or blanket.
Textured blankets. Combining post stitch ribs with a softer background stitch creates depth without complicated cables. Our textured blanket uses this approach to add raised ribs along its length.
Each of these textures uses exactly the same two stitches you’ve already learned. Only the arrangement changes.
Edge Stitches and Turning Chains
The edges of post stitch fabric often cause confusion, because the first and last stitches usually aren’t post stitches.
Edge stitches are usually regular stitches. Most patterns start and end each row with a normal double crochet or half double crochet worked into the top of the stitch, not around the post. This keeps the edges straight and gives you a stable column to turn on.
Turning chains. Your turning chain usually stands in for the first regular edge stitch. Check whether your pattern counts it as a stitch, and keep that consistent every row.
Neat edges. If your edges look loose or uneven, try replacing the turning chain with a stacked single crochet or a chainless starting double crochet for a tidier column.
Count your post stitches. Post stitches are easy to skip, especially the last one before the edge. Count your stitches at the end of every row while you’re learning.
Post Stitches in the Round for Hats
Working post stitches in the round is often easier than in rows, because the same side always faces you.
No flip rule. In rounds, you work front post around raised stitches and back post around recessed stitches every single round. There’s nothing to reverse.
Ribbed brims. A brim of alternating front and back post double crochet is stretchy and snug, ideal for hats.
Joining rounds. Join each round with a slip stitch to the top of the first stitch, then chain up and begin the next round. Keep your joins in line at the back of the hat.
Shaping the crown. Some hats use post stitch decreases, which combine two post stitches into one, to keep the texture flowing into the crown. Our cable hat uses a decrease round like this before gathering the top closed.
How Crochet Cables Work
Once you can make front post stitches, you can make cables. A cable is simply a group of raised post stitches that cross over each other.
Start with columns. First, you build raised columns of front post stitches on a background of regular stitches or back post stitches. The background makes the raised columns stand out.
Cross the columns. On a cable row, you work the post stitches out of order. For example, in a simple six stitch cable, you skip the first three post stitches, work front post stitches around the next three, then go back and work around the three you skipped.
The cross creates the twist. Because the second group is worked around the earlier stitches, the two groups cross over each other. That crossing creates the twisted rope look.
Taller stitches help. Cables often use front post treble crochet on the crossing row, because the extra height lets the stitches reach comfortably across.
Cables need a background. Without a contrasting background, cables blend into the fabric. A background of back post stitches, half double crochet or double crochet gives them definition.
Crossing Cables in Front or Behind
The direction your cable leans depends on whether you work the skipped stitches in front of or behind the stitches you just made.
Working in front. After working the second group, bring your hook in front of those stitches to work around the skipped posts. The skipped stitches cross over the top, which makes the cable lean one way.
Working behind. Fold the stitches you just made slightly forward, and work around the skipped posts behind them. The second group stays on top, and the cable leans the other way.
Both are still front post stitches. This is where many crocheters get confused. Even when you work “behind” the stitches you just made, you’re still making front post stitches around the skipped posts, so they stay raised. You’re just reaching behind the new stitches to get to them.
Left and right leaning cables. Patterns use both directions to create different looks. A pattern will tell you which to use, and it’s worth reading that line slowly before starting the cable row.
Our crochet cable hat pattern crosses front post stitches to create a band of diamonds, and the crochet pullover pattern uses leafy cables along every raglan line.
Working Two Rows Below
Many cable patterns say to work a post stitch “two rows below.” This is one of the most confusing instructions in crochet.
What it means. Instead of working around the post of the stitch directly below, you reach down past the row below and work around the post of the stitch in the row before that.
Why patterns do it. In many cable designs, the background rows are worked in short stitches on the wrong side, and the post stitches are worked only on right side rows. Working two rows below lets the post stitches stack directly on top of each other, forming smooth columns.
How to find it. Follow the raised column down. The post you want is the raised stitch from your last right side row, not the short background stitch just below your hook.
Skip the stitch behind it. When you work a post stitch two rows below, you usually skip the stitch in the current row that sits behind it, so your stitch count stays the same. Check your pattern for this detail.
If your cables look disjointed or overlap too much, you may be working around the wrong post. Go back to the last correct row and follow each column down carefully.
Choosing Yarn and Hook for Post Stitches
The right yarn and hook make post stitches easier to work and more beautiful to look at.
Choose a smooth yarn. Smooth, plied yarns show off raised stitches and cables clearly. Fuzzy or textured yarns hide the detail you’re working so hard to create.
Go light. Light and medium colors show the shadows that make cables stand out. Dark colors work, but the texture is more subtle.
Pick a springy fiber. Wool and wool blends give cables lovely definition and bounce. Acrylic is easy to care for and great for practising. Cotton shows crisp detail but is less stretchy, which can make ribbing feel firmer.
Size up if needed. Because post stitches pull the fabric in, many crocheters use a hook half a size or a full size larger than they would for plain stitches. Check your gauge in the post stitch pattern before deciding.
Practise with worsted weight. A medium weight yarn and a 5mm hook make posts easy to see and handle while you’re learning.
Why Post Stitch Fabric Pulls In
Post stitches and cables make fabric thicker and narrower than plain stitches.
Why it happens. Each post stitch wraps around another stitch and pulls it forward or backward. Cables pull even more, because the crossing stitches draw the fabric in.
What it means for your project. A post stitch panel can be noticeably narrower than a plain panel with the same stitch count. On garments and blankets, that affects the finished size.
How to plan for it
- Always swatch in the post stitch or cable pattern, not plain stitches.
- If the fabric is too tight, try a larger hook.
- Follow the pattern’s gauge for the cable section, which is often different from the plain sections.
- Use more yarn than you might expect, since post stitches use extra yarn.
If your fabric is narrowing in a way that looks like missed stitches, our guide on why crochet gets wider or curls can help you tell the difference.
A Beginner Practice Swatch
The best way to learn front post double crochet and back post double crochet is a small practice swatch. This one takes about twenty minutes and teaches you everything in this guide.
- Chain 21. Work a row of double crochet, so you have 19 stitches plus your turning chain.
- Work two more rows of double crochet. Now you have plenty of posts to work around.
- Next row: work one regular double crochet at the edge, then alternate front post and back post double crochet across, ending with a regular double crochet. This is your first row of ribbing.
- Next row, after turning: remember the flip rule. Work front post around the stitches that face you raised, and back post around the ones that sink away. Repeat for four rows.
- Finally, try one simple cable: skip two front post stitches, work front post around the next two, then go back and work front post around the two you skipped.
Look at your finished swatch. You’ll see ribbing, the flip rule in action and your very first cable crossing. Keep it as a reference for future projects.
Troubleshooting Post Stitches and Cables
My post stitches aren’t raised. Check that you’re working around the post, not into the top loops, and that you’re using the right direction for the side you’re working on.
My back post row looks wrong. You’re probably working in rows and need to follow the flip rule. Use front post on right side rows and back post on wrong side rows to keep a column raised.
My cables look flat. Make sure the background is a contrasting stitch, use taller post stitches for crossings, and check that every cable stitch is a front post stitch.
My cables twist the wrong way. You may be working the skipped stitches behind instead of in front, or the other way round. Check the cable instruction carefully.
There are gaps behind my cables. Crossing cables can leave small holes. Working the skipped stitches snugly, and using the stitch behind each post as directed, helps close them.
My stitch count keeps changing. Post stitches are easy to miss, especially at the edges. Count every row, and remember whether the stitch behind a post stitch should be skipped.
My fabric is stiff. Post stitch fabric is naturally thick. A larger hook or a softer yarn can help.
My edges are uneven. Make sure the first and last stitches are regular stitches, and keep your turning chain consistent.
Quick Answers to Related Questions
These are questions crocheters often ask next, with short answers and links to our guides.
Third Loop Ribbing Versus Post Stitch Ribbing
Third loop ribbing is made by working into the extra strand behind a half double crochet, which pushes the top loops forward. It creates a softer, knit look rib than post stitches. Our crochet ribbed beanie pattern uses third loop ribbing, and our upcoming guide on the third loop in crochet explains it fully.
Textured Blankets With Post Stitches
Alternating front and back post stitches creates raised ribs across a blanket. Our textured crochet blanket pattern combines post stitches with herringbone half double crochet for a rich, cosy texture.
Cable Garments for Beginners
A cardigan or sweater with a single cable panel is a great first cable garment, since most of the piece is simple. Our crochet pullover pattern is a more advanced project once you’re confident with cables.
Changing Colors With Post Stitches
Color changes work the same way with post stitches. Finish the last stitch of the old color with the new color. Our guide on how to change colors in crochet explains the method.
Blocking Cables
Gentle blocking helps cables settle and makes the fabric drape beautifully, but avoid flattening raised textures too much. Our guide on how to block crochet covers how to block textured pieces.
Post Stitches With Chunky Yarn
Chunky yarn makes post stitches quick and dramatic, with big, bold ribs and cables. The posts are easy to see, which helps beginners. Just remember that chunky post stitch fabric is very thick, so it suits blankets, cushions and bags better than fitted garments.
Pricing Cable Projects to Sell
Cables take more time and yarn than plain stitches, so a cable hat or blanket deserves a higher price. Our guide on how much to charge for crochet items shows how to include that extra time.
Frequently Asked Questions
From Simple Ribs to Beautiful Cables
Front post double crochet and back post double crochet open up a whole world of texture. Start with a small swatch, practise finding the post, and remember the flip rule when working in rows. From there, ribbing is just alternating stitches, and cables are just post stitches worked in a different order.
With a little patience, the cable sweater that once looked impossible will feel like your next exciting project.
Ready to try? Our crochet cable hat pattern is a lovely first cable project, or browse our free crochet sweater patterns for your next challenge.
Try Your First Cable Project